Clear the clutter, keep the room.
A lived-in room photographs badly for reasons that have nothing to do with the room itself. Room Declutter takes one picture of the mess and returns the same space with the belongings gone and the furniture exactly where it stands.
What counts as clutter and what counts as furniture
Room Declutter draws a single line through your photograph. On one side sit the things that live in the room, and on the other sit the things that are merely out. The sofa stays, the bookcases stay, the coffee table and the television stay. The coat over the sofa arm, the mugs and cans on the table, the shoes by the door and the open box on the carpet all leave.
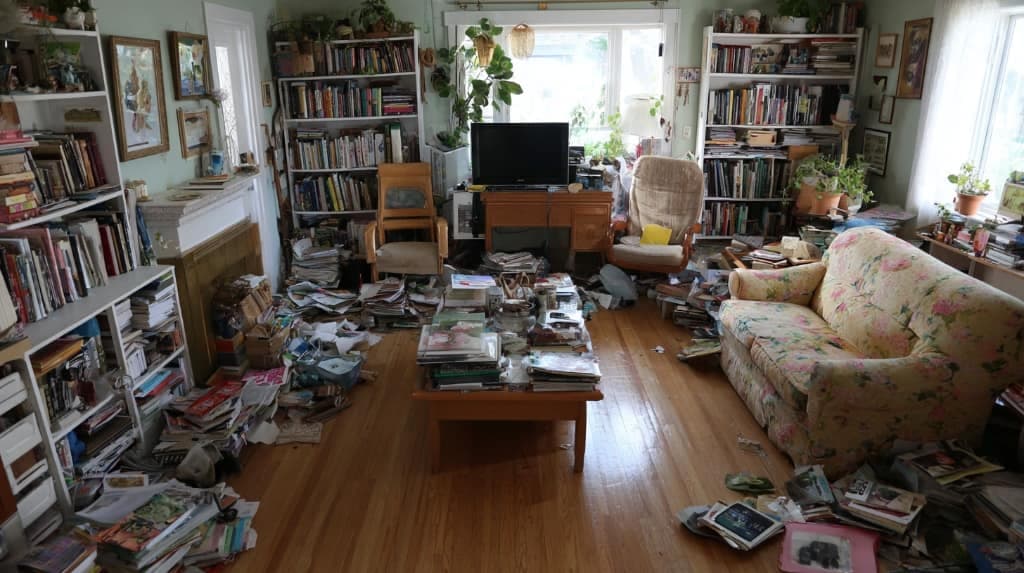 As shot
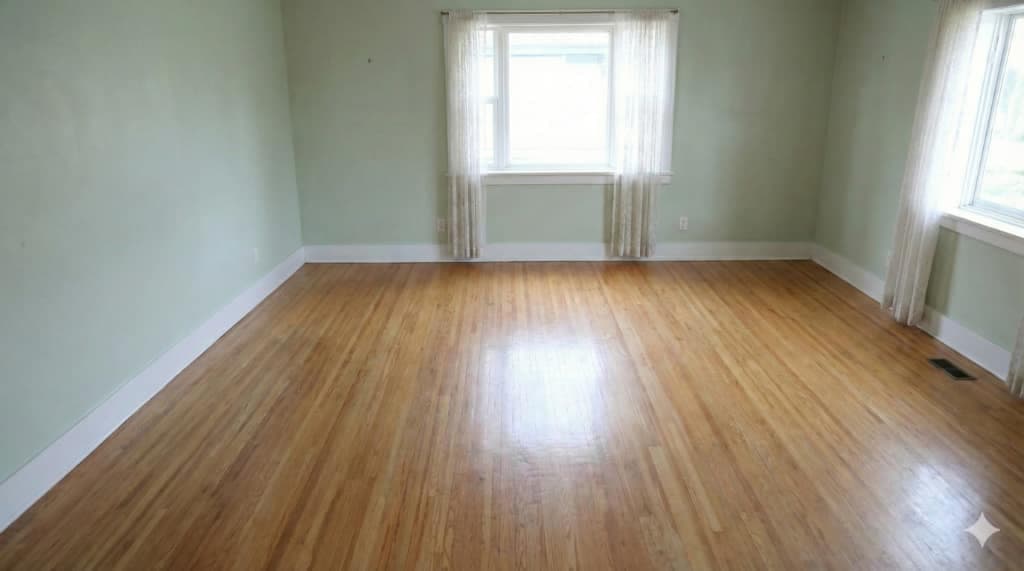 Cleared
That line is easier to draw than it sounds, because clutter has a signature. It sits at odd angles, it stacks, it lands on surfaces meant for something else, and it has no relationship to the shape of the room around it. A sofa has a footprint and a reason to be where it is. A scatter of objects across a carpet has neither, and that difference is legible in a photograph long before anyone names the individual items.
The interesting part is the middle ground. A throw folded over a chair arm reads as decor, while the same throw crumpled over three cushions reads as mess. Books on a shelf are furnishing; books stacked on the floor are not. Drying racks, laundry baskets, flattened cardboard and charging cables fall on the clutter side almost every time. There are no options to set here, so if one specific piece has to go or has to stay, that is a job for taking out a single named object instead.
Photographing a room that is genuinely lived in
The upload is one photo of the room as it actually is, mess included, which is a real relief when you are photographing an occupied home on a schedule. You are not tidying first. You are shooting first and tidying afterwards, and that reverses the worst hour of the job.
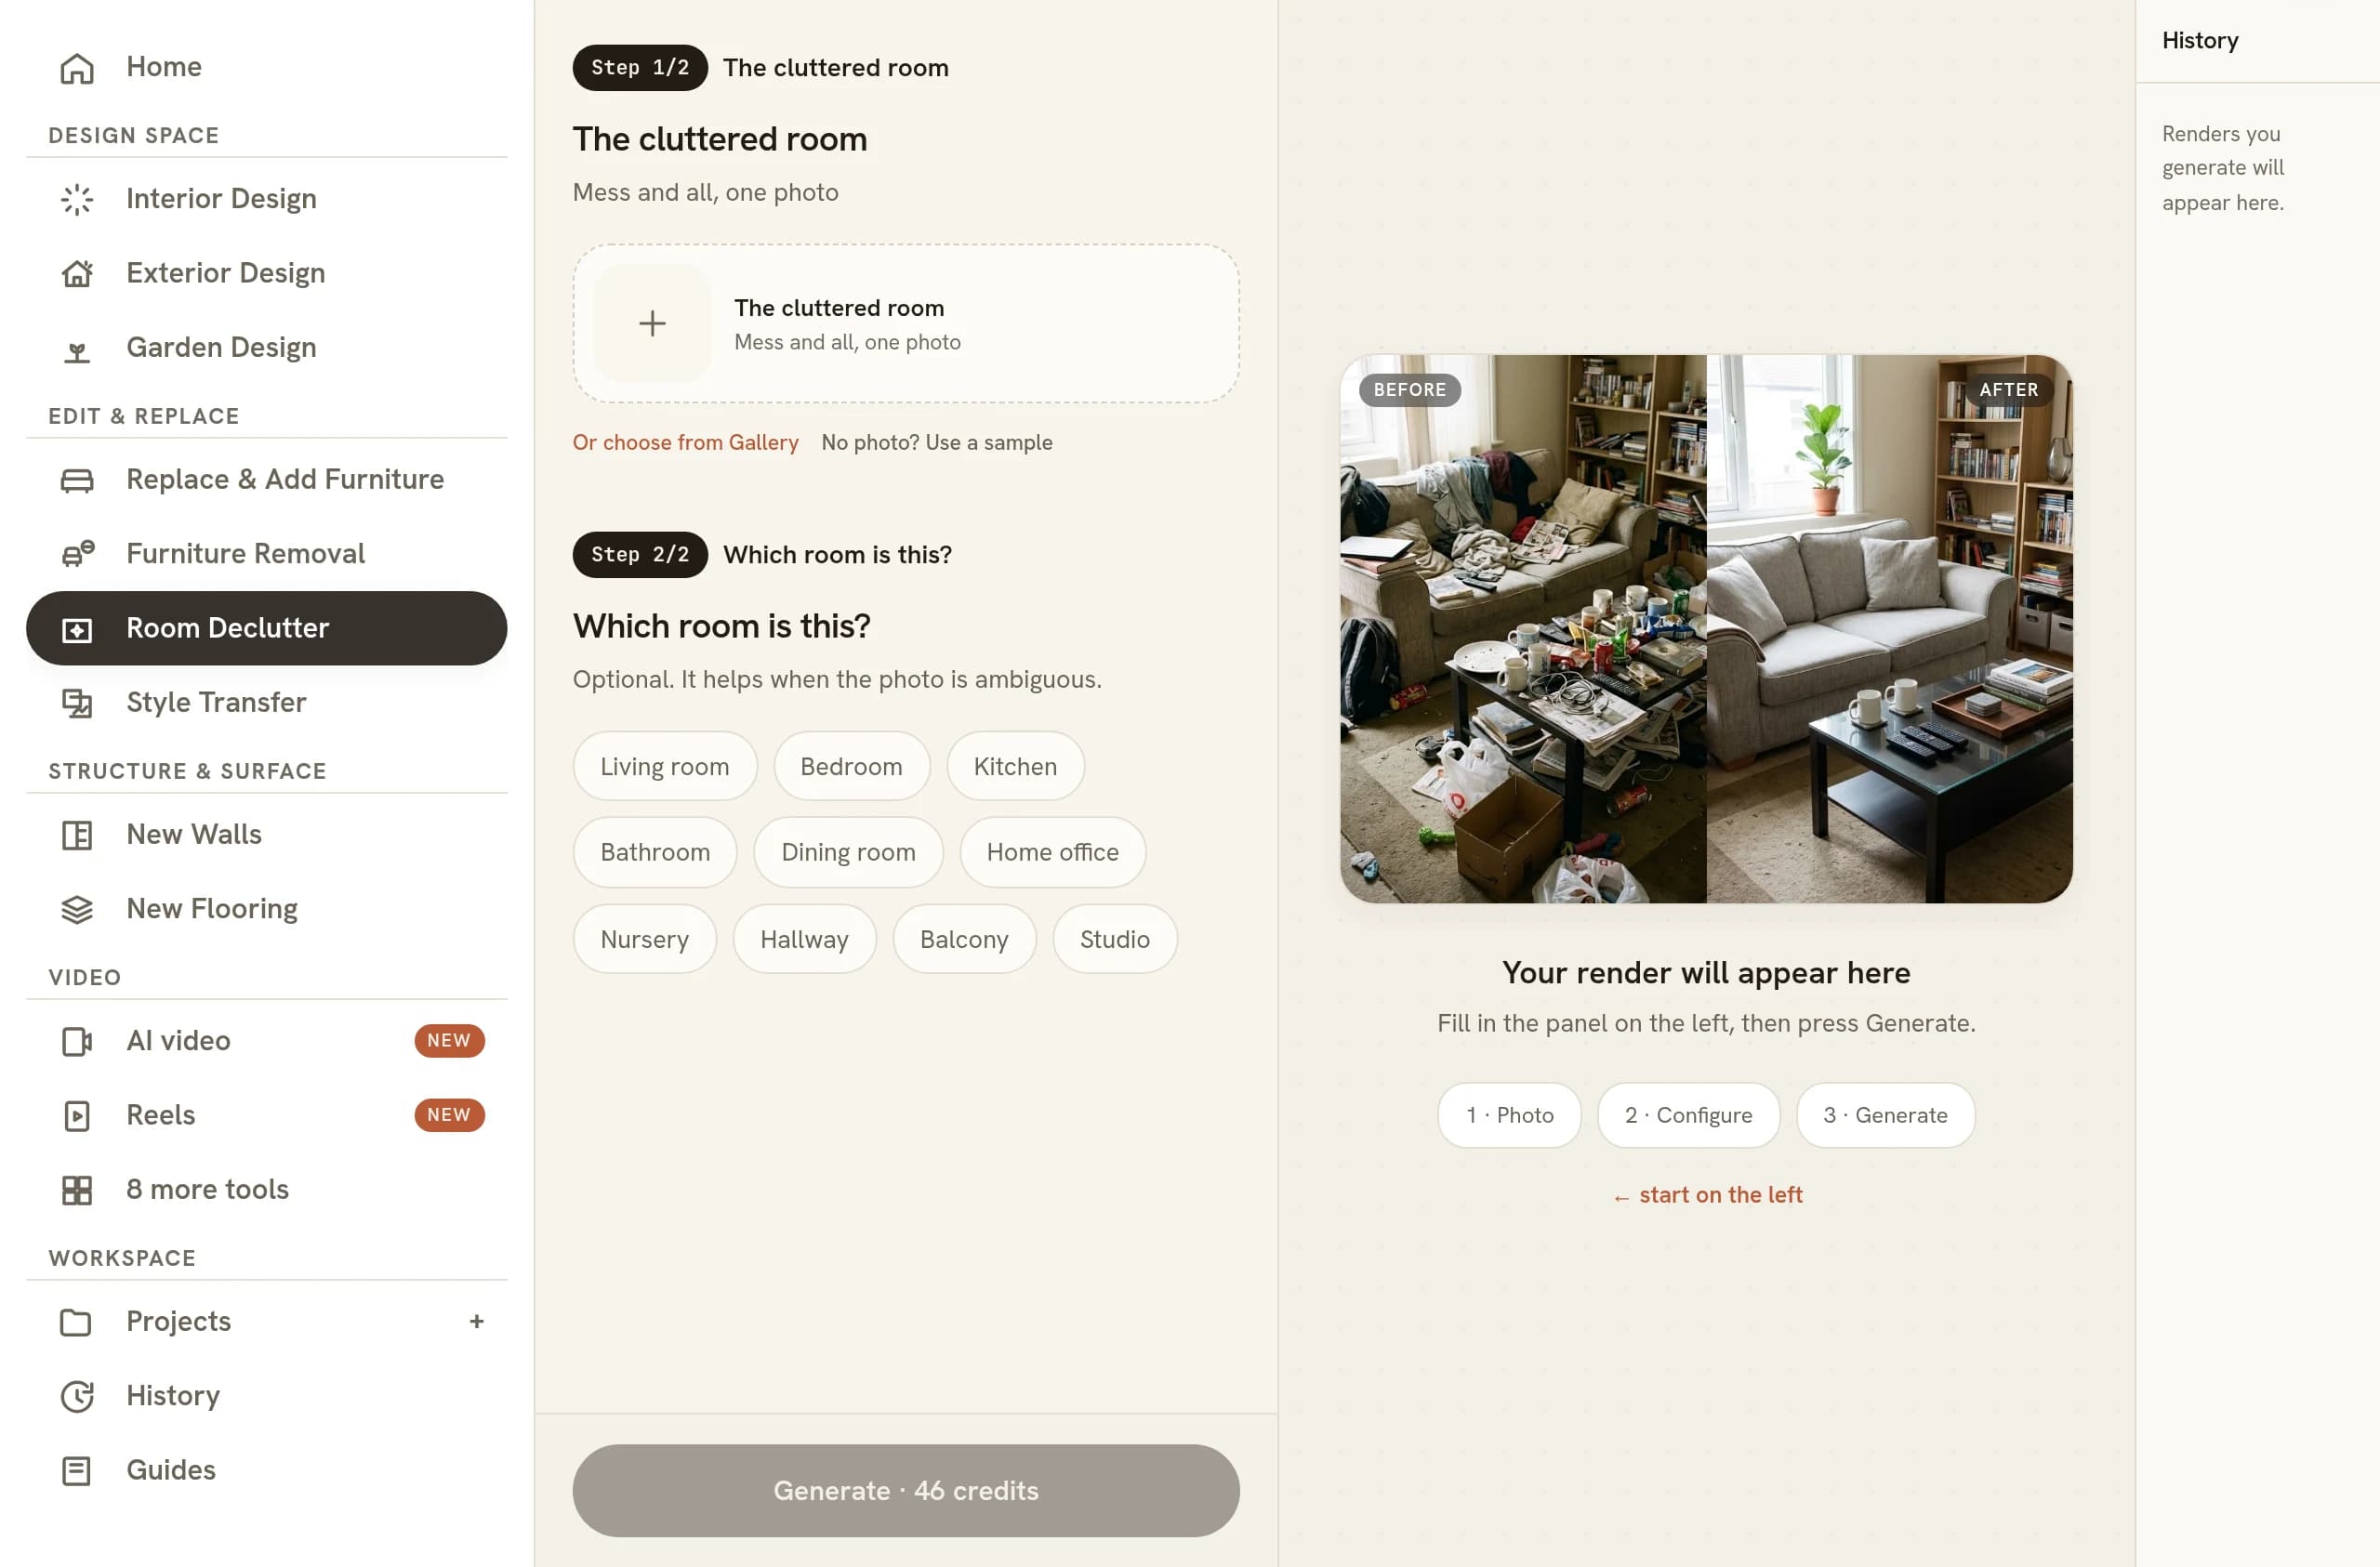
Composition still matters, and it matters more than usual. Stand in a corner so the frame carries two walls and the floor between them, because the floor is what a cleared room is mostly made of. Hold the camera level at chest height rather than tilting down at the pile in front of you, since a tilted camera bends the verticals and makes the walls harder to reconstruct. Open the curtains, put the main light on, and let the exposure favour the room rather than the window. A picture taken on a phone is completely normal input, so long as it is sharp and the room is bright enough to read into the corners.
One thing genuinely does help before you press the shutter. Move anything standing directly against a wall you care about, because a bin bag leaning on the skirting hides the one strip of surface that has to be invented back. The same goes for a pile heaped into a corner, since a corner is where two wall planes and the floor all have to agree with each other. Everything else can stay exactly where it fell.
Why the surfaces underneath are the hard part
Removing an object from a photograph is the easy half. The hard half is what goes in the space it leaves, and that is where every declutter result is really decided. Behind the pile there is carpet nobody has seen, a run of skirting board interrupted wherever the mess leans on it, and a patch of wall whose colour has to match a wall lit by a window slightly further away.
This is why heavily loaded rooms are the ones worth checking closely. When almost the whole floor is covered, very little visible texture is left to extend across the gap, and the fill has to reason from a narrow strip at the edge of the frame. Plank direction has to continue, carpet pile has to keep its grain, and a tiled floor has to keep its grid square to the walls. The shadow an object cast has to leave with the object too, rather than lingering as a dark smudge on clean carpet.
Shadows are the tell that gives away sloppy work in this category. A mug removed from a table leaves a ring of contact shadow, and a coat removed from a sofa arm leaves a soft dark shape on the fabric beneath it. When those stay, the eye reads the picture as edited without being able to say why. When they leave cleanly, the room simply looks tidy.
What to look at before you use the picture
- The floor along the walls. Open the result at full size and follow the skirting all the way round. Breaks and bends show up here first.
- Shadows without owners. Any dark patch on carpet or fabric that no longer has an object above it needs another pass.
- Furniture that should not have moved. Compare against the original: the sofa, the shelving and the table belong in the same places.
- Half removed objects. A table leg standing on nothing or a cable running into a wall is the usual leftover in a dense room.
- Anything that was actually a defect. A stain or a crack is part of the property, not part of the mess, and it should not vanish quietly.
Decluttering comes before staging, not instead of it
A cleared room and a staged room answer two different questions. Clearing answers what the space is: how much floor there really is, where the light falls, how the proportions read once the noise is gone. Staging answers what the space could be, by putting a scheme into it. Running them in that order is what makes the second one work, because furniture placed on top of a cluttered photograph inherits the clutter and looks pasted on.
For an occupied property the sequence is usually three steps. Photograph the room honestly, clear the belongings, then decide whether the remaining furniture is doing the property any favours. Sometimes it is, and the cleared photo is the finished photo. Sometimes the sofa is tired and the room wants a different scheme entirely, which is the point at which the question of whether staging earns its cost becomes worth asking properly.
Stagers tend to reach for this first for exactly that reason. A cleared photo is a usable brief, and the rest of the staging workflow for a busy studio starts from a room whose surfaces are already visible.
When one photo is not the whole job
A single room rarely travels alone. A listing is a whole set of photographs, an occupied flat is every room at once, and the value of clearing shows up across the set rather than in any one frame. That is a volume problem more than a creative one, and running a batch of rooms together keeps a whole property consistent in a single sitting.
The tool itself stays deliberately small. One upload, no settings, one result. Everything that makes a declutter good or bad happens in the photograph you take and the attention you give the result afterwards.
Common questions
Is it honest to declutter a listing photo?
Yes, within a limit worth naming. Clearing belongings shows the room as it will be handed over, because the boxes and the laundry leave with the occupier. What it must not do is hide a condition of the property itself, such as damp on a wall or a cracked tile, since those stay behind after the mess goes.
Can I declutter a room photo taken on my phone?
A phone photo is the normal input. Room Declutter asks for one picture of the room and nothing else, with no options to fill in and no measurements to supply. Hold the phone level, get the whole room in frame, and let the camera meter for the window rather than the darkest corner.
Does decluttering remove family photos and pet bowls?
It treats them as belongings, so they generally go. Framed photographs, post on the side table, medication, feeding bowls, litter trays and toys all read as personal rather than architectural. That is usually what you want for a listing, since the point of clearing a room is to let a stranger picture their own life in it.
Should I declutter every photo in a listing set?
Clear every room you photograph, or none of them. A set where the living room is immaculate and the bedroom is knee deep in washing looks like an oversight rather than a choice, and buyers notice the inconsistency before they notice either room. Run the whole set through in one sitting.
Can I run the same photo through more than once?
Yes, and a second pass is often worth it. Each run is a fresh generation rather than a repeat of the last one, so two attempts on a heavily loaded room will differ in what they catch and how the floor fills in. Keep the original file, compare the results side by side, and keep the better one.
Try it on your own plan
Upload a floor plan or a room photo and see the first renders in about thirty seconds.
100 free credits · no credit card required
Get the next guide when it lands
We publish these as we work through what people actually ask about pricing, staging and turnaround. Leave an address to hear when a new one goes up.
Nous utilisons votre adresse uniquement pour vous écrire au sujet de RoomGen. Politique de confidentialité · Conditions