See your room with a new floor.
Flooring is the change that alters a room most and disrupts it worst. Swap it in a photo first: one upload, the furniture left exactly where it stands, and the same room comes back with oak, marble or terrazzo laid underneath it.
What stays put when the floor changes
The tool replaces one surface and leaves the rest of the photograph alone. You upload a single picture of the room as it is, furniture and all, pick a material, and the same picture comes back with a new floor laid under everything. The sofa does not shuffle. The rug still covers the boards it was covering, the table legs still meet the floor with their contact shadows intact, and the light still arrives from the same window at the same softness.
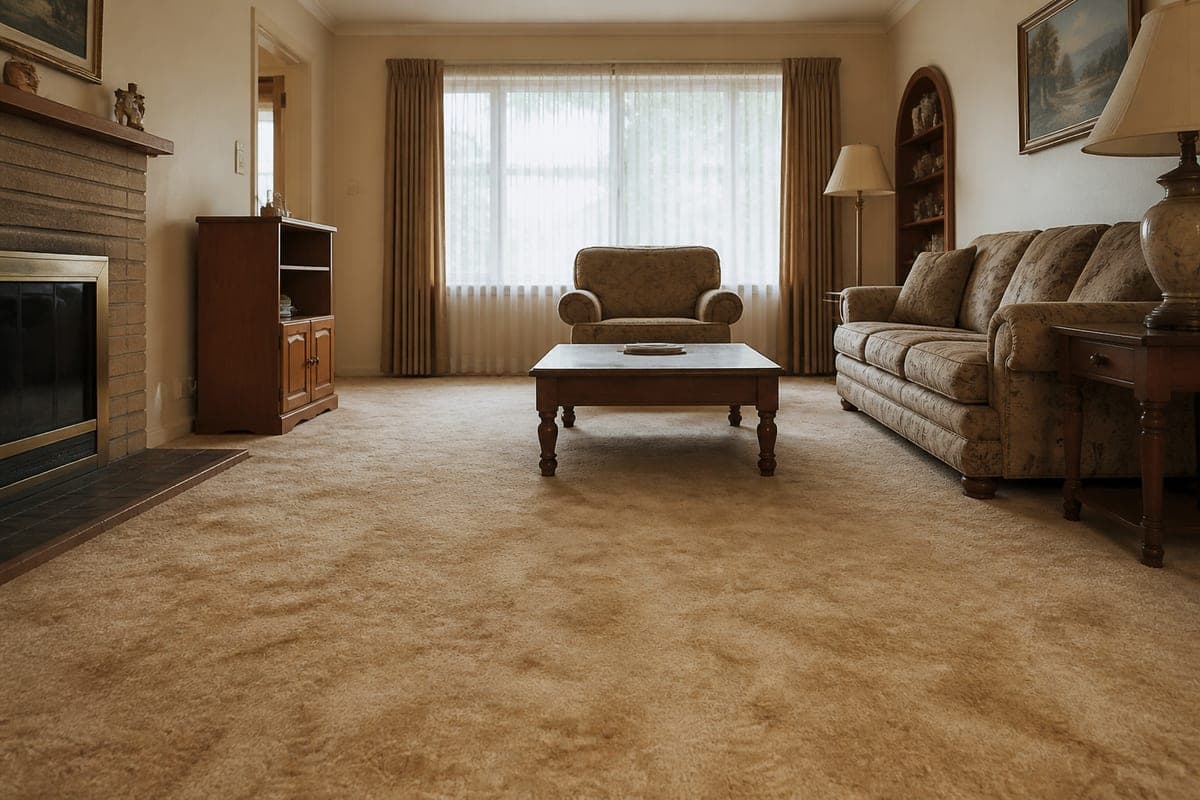 As shot
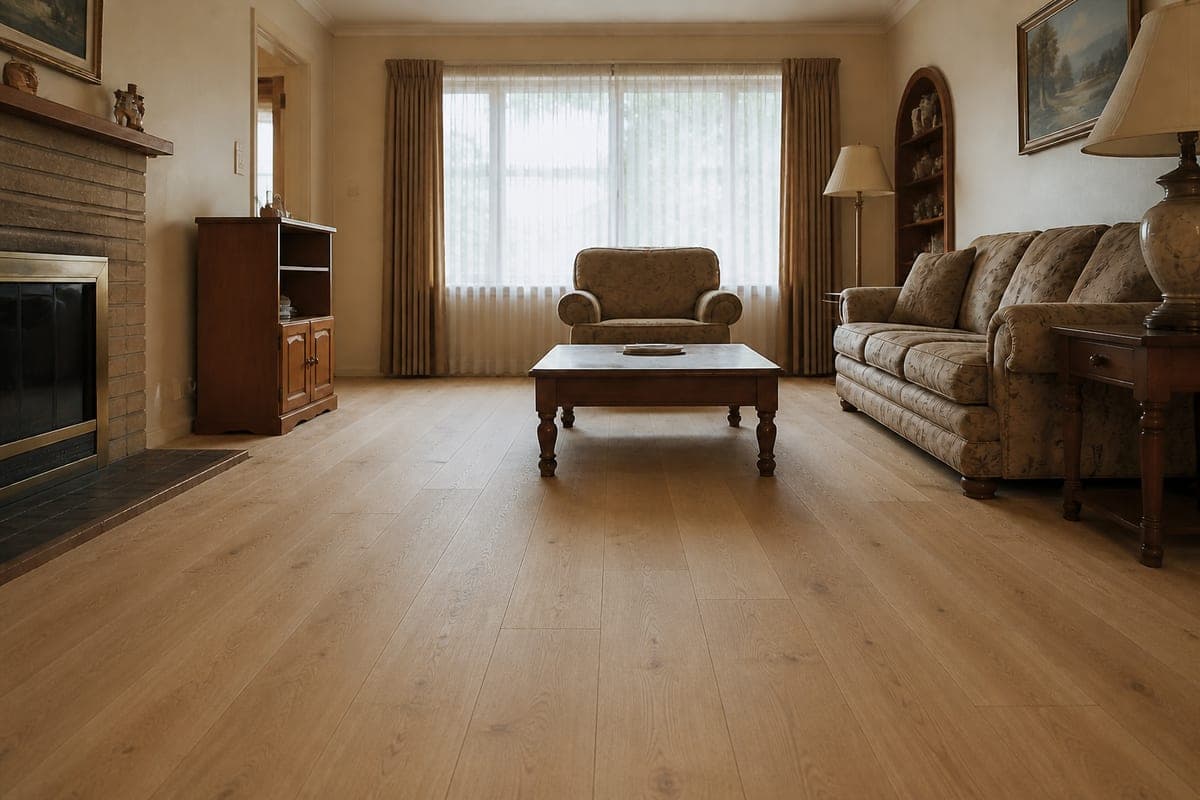 Wide-plank oak
That constraint is the whole reason the result is believable. Everything the room is actually built from comes back untouched: the skirting keeps its line, the vents keep their grilles, the doorway keeps its metal strip. What is new lies flat in the space the old surface occupied and narrows away towards the far wall on exactly the angle your camera gave it, so the geometry of the photograph never shifts. Open the two images side by side at full size and everything above ankle height should land in the same pixels. The room is not re-rendered. It is re-floored.
This is also why the photo you upload does not need tidying first. A floor you can only see in patches between a sofa and a coffee table is still a floor the tool can replace, because it replaces the parts you can see and leaves the furniture sitting on top of the rest.
Plank direction is a decision, not a default
Wood has a direction, and a photograph shows it whether you thought about it or not. The default here lays wide-plank white oak with the boards laid along the room's long axis, which is the safe answer in most rooms: receding lines pull the eye towards the far wall and make the space read longer than it measures. In the example above that is exactly what happens, and the room gains depth it did not have under carpet.
Real floors do not always run that way. Direction usually follows the joists, the longest wall, or the main source of light, and boards laid across the frame will widen a narrow room instead of lengthening it. You can ask for either. The free text box takes anything the swatches do not cover, so a phrase such as wide oak planks running left to right across the frame is a perfectly good material description, and so is a herringbone set at 45 degrees to the wall.
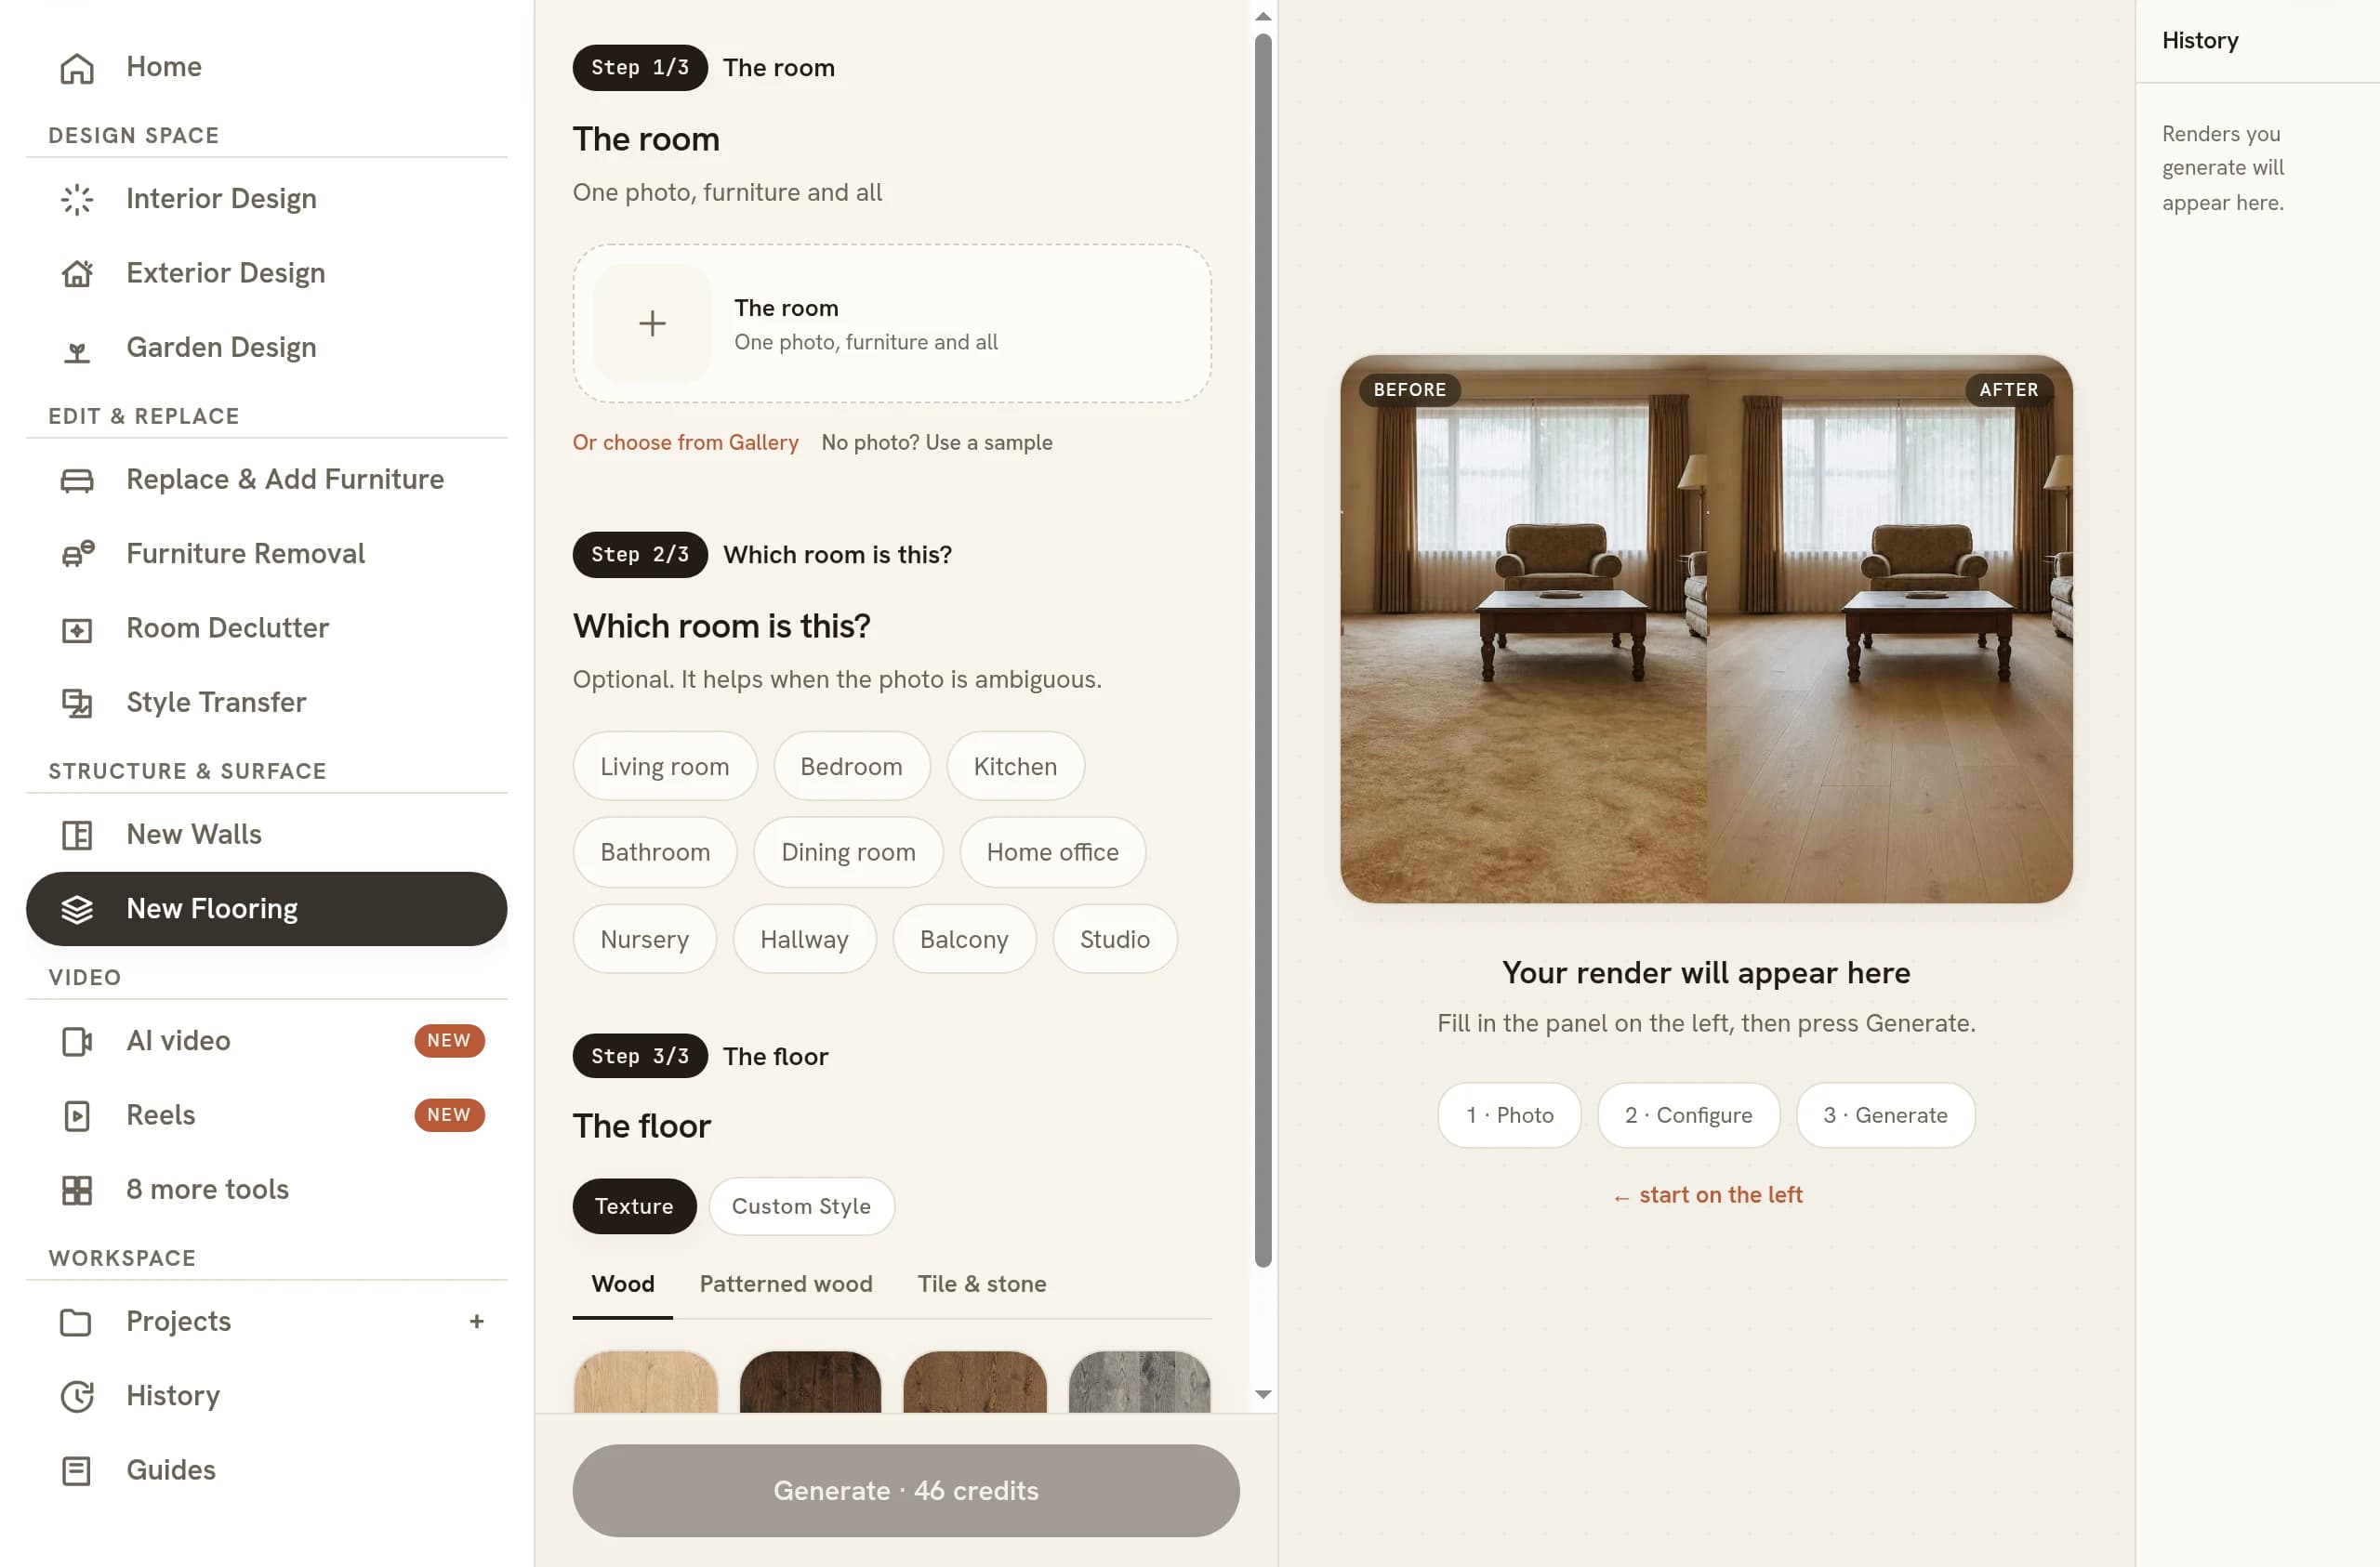
Generate both and look at them together. Direction is one of the few flooring decisions that is genuinely hard to picture from a sample board and genuinely obvious in a photo of your own room.
Getting the scale of a plank or tile right
Scale is where a floor swap goes wrong most often, and it goes wrong quietly. Nothing looks broken. The room simply feels slightly off, because the planks are too narrow for the space or the tiles are too big for it, and a floor at the wrong size makes a room read smaller than it is. It is the same failure that turns up when AI renders get scale wrong elsewhere in a scene, moved down to the one surface that covers the entire frame.
The fix is to name the size rather than the material. The swatch values already do this, which is why they read as 7-inch planks, 5-inch herringbone blocks, wide planks or large-format polished slabs instead of just oak and marble. Carry the same habit into anything you type yourself. A tile description without a size leaves the size to chance.
Then check the result against something whose size you know. The height of a skirting board, the width of a door frame, the depth of the hearth in front of a fireplace: line a plank up against one of those and you can tell in a second whether the floor belongs to the room or to a showroom photograph of a much larger one.
The transition at the door is the thing to check
Every floor meets something else at its edges, and those junctions are where a surface pasted flat over a photograph gives itself away. Look there before you look anywhere else. A floor that is convincing in the middle of the room and wrong at the doorway is a floor nobody will believe, because the doorway is exactly where a real fitter would have had to make a decision.
- The threshold at each door. The new floor should stop at the same line the old one did, with the strip or the change of material still reading as a deliberate edge.
- The hearth and any built-in edge. Where the floor meets stone, tile or a fireplace surround, the join should stay straight and the hearth should keep its own material.
- Skirtings and vents. Boards run up to the skirting and around a vent, never over either. The wall to floor line stays unbroken along its whole length.
- Contact under furniture. Sofa feet and table legs should still sit on the surface with a shadow beneath them rather than hovering a few millimetres above it.
The biggest change for the smallest spend
No other single edit changes a room this much. Flooring covers more area than any other surface, it sets the colour temperature of everything standing on it, and replacing it for real means emptying the room, booking a fitter and losing the use of the space for days. That gap between how much it changes and how much it costs to try is the reason a visual is worth generating before a quote is.
A run costs the same whichever material you choose. Design tool runs are charged at the preview tier, which is 50 credits, so a shortlist of four floors is four runs and marble is not dearer to look at than oak. Set that against what virtual staging costs more generally and the flooring swap is the cheapest way to answer an expensive question.
For a seller the argument is different but points the same way. Dated carpet is one of the few things a buyer cannot see past, and a photo set that shows the room with a floor they would actually choose gives them somewhere to put their imagination. That is the ordinary case for whether virtual staging earns its place, applied to the surface with the largest share of the frame.
Where the floor swap sits in a sequence
The output is an ordinary image, so it becomes the input to the next edit. The order that tends to work is clutter first, floor second, lighting last. Clearing the room with the tool that removes furniture from a photo gives the floor more visible area to work with, which makes the material easier to judge, though it also throws away the thing that makes a flooring visual persuasive: the proof that this is your room and not a catalogue.
Lighting comes last because it is the change that flatters. A matte oak and a polished marble behave very differently under low evening sun, so once the floor is settled you can move the room to another time of day and see the sheen the material would really have. Judge the floor at midday. Sell it at golden hour.
Two habits make the whole exercise more useful. Keep the original photo next to every version you generate, because the comparison is the argument. And keep the shortlist short: three floors you can hold in your head beat a dozen you scroll past.
Common questions
Can I see new flooring in my own room before I buy it?
Yes, and it needs nothing beyond the photo: no measurements, no floor plan, no emptying the room first. It works on the space as it stands today, so the version you generate is recognisably your own room rather than a catalogue shot, which is the whole reason it settles an argument about a material.
Can I try tile or carpet instead of wood?
Yes. The swatches are grouped as wood, patterns and stone, covering oak, walnut, herringbone, chevron, parquet, marble, travertine, limestone, terrazzo, microcement and patterned encaustic tile. Anything the swatches miss goes in the free text box in your own words, including carpet, and that description is used as written.
Is a flooring visualiser accurate enough to order a real floor from?
Treat it as a look test, not a sample. It answers whether a tone and a pattern suit the room you have, at the scale of the room you have. Screens shift colour and no image carries texture underfoot, so order a physical sample of the shortlist before you place the real order.
Does a flooring visualiser work on a phone photo?
A phone photo is fine, and so is an agent's listing shot or a finished render. Shoot from chest height with the floor visible from the near corner to the far wall, in daylight if you can. A wide phone lens causes no trouble because the perspective of the original photo is kept.
Do I have to disclose changed flooring in a listing photo?
Label it, yes. A repainted wall reads as a suggestion, but a new floor reads as a claim about the condition of the property, and a buyer arriving to find the old carpet will feel misled. Mark the image as a visualisation and keep the unedited photo in the same set.
Try it on your own plan
Upload a floor plan or a room photo and see the first renders in about thirty seconds.
100 free credits · no credit card required
Get the next guide when it lands
We publish these as we work through what people actually ask about pricing, staging and turnaround. Leave an address to hear when a new one goes up.
Nous utilisons votre adresse uniquement pour vous écrire au sujet de RoomGen. Politique de confidentialité · Conditions