Remove furniture from a photo.
Upload the room as it stands, name the piece you want gone, and the photo comes back without it. Furniture Removal is the tool. It works on one named piece at a time, and it clears the shadow and the reflection along with the object.
What Furniture Removal takes out
Furniture Removal deletes one named piece and leaves the rest of the room untouched. You give it a single photo of the room as it is now and say what goes: the sofa, the bed, the table and its chairs, the rug, a wardrobe, the art on the walls. What comes back is the same photograph with that piece missing, along with its cast shadow, its contact shadow and any reflection of it in glass, a mirror or a polished floor.
 As shot
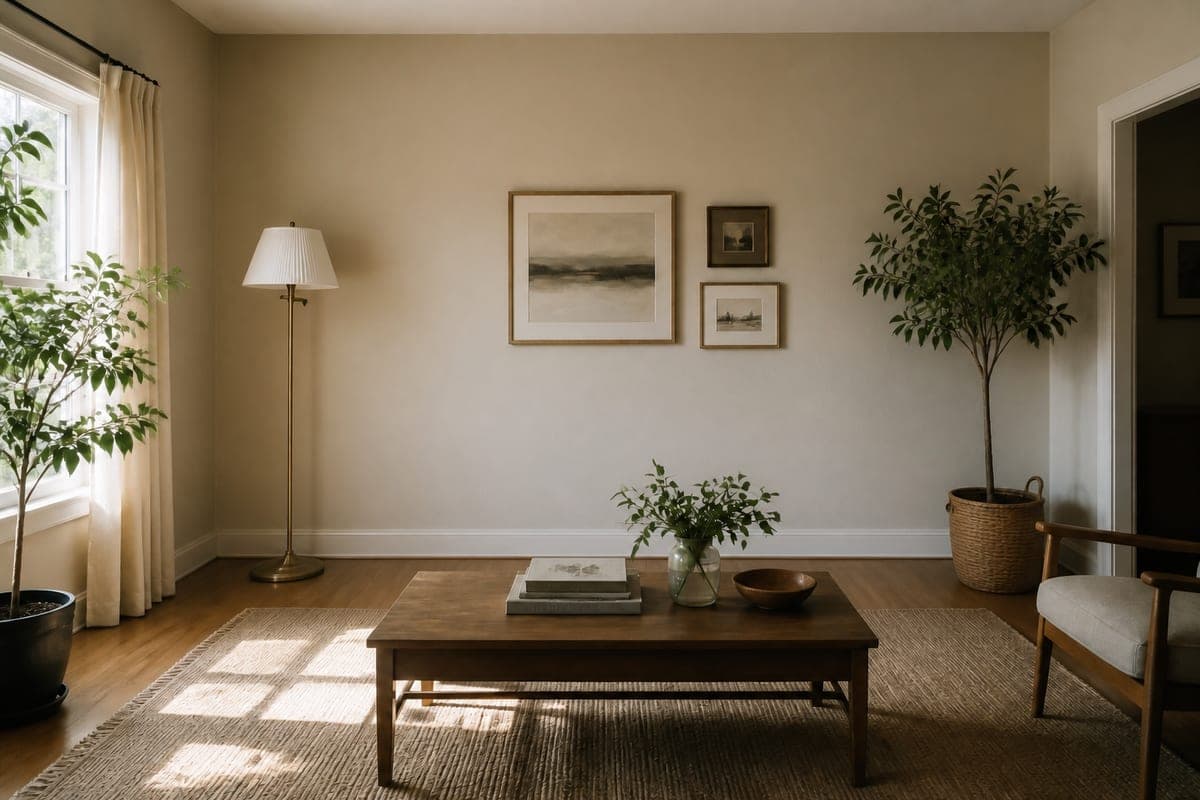 Sofa removed
Nothing else is allowed to move. Same camera, same framing, same daylight direction, same coffee table with the same books on it. That restraint is what makes the tool useful to a stager: strip a room piece by piece and every version still lines up with the original, so a client comparing two of them sees one room, not two similar renders.
Running it from the Designer library
The Designer library holds the styling tools as guided forms. You pick your options, then apply, rather than writing a prompt and hoping. The Furniture Removal form asks for two things and then gets out of the way.
- The room. One photo, as it is now. A furnished room shot straight on, not a floor plan.
- What to remove. Six presets sit here as picture cards: the sofa, the bed, the table and its chairs, the rug, the freestanding wardrobe, and the art on the walls. The field also takes free text, so the white fabric sofa is a valid answer. Left alone it defaults to whichever single item dominates the frame.
- Remove it. One press, one render.
Be specific when the room holds two of something. The sofa in a room with a three-seater and a loveseat is a coin toss, and the grey sofa under the window is not. The free-text field is there for exactly this, and one careful sentence is cheaper than two renders.
Each pass costs what a render costs, and renders are priced by quality: about 21 credits for a concept (at most 52), 50 for a preview, 70 for a standard render and 150 for a hero image. New accounts start with 100 credits. Emptying a full living room takes several passes, so decide what goes at a lower quality and run only the keeper at the quality you need. More on the per-photo arithmetic in virtual staging cost per photo.
Furniture Removal or Room Declutter
The two tools sit next to each other and answer different questions. Removal takes furniture out of the room. Declutter tidies the room without changing the design: the mess goes, the furniture stays. Declutter asks nothing at all, since a form field on a one-job tool is only a step between a photo and a result.
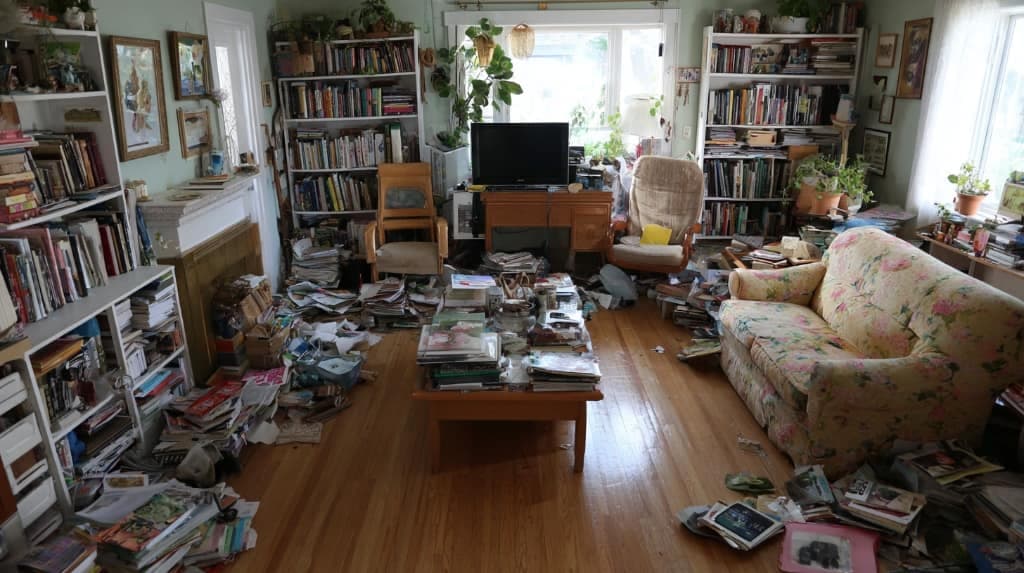
As shot
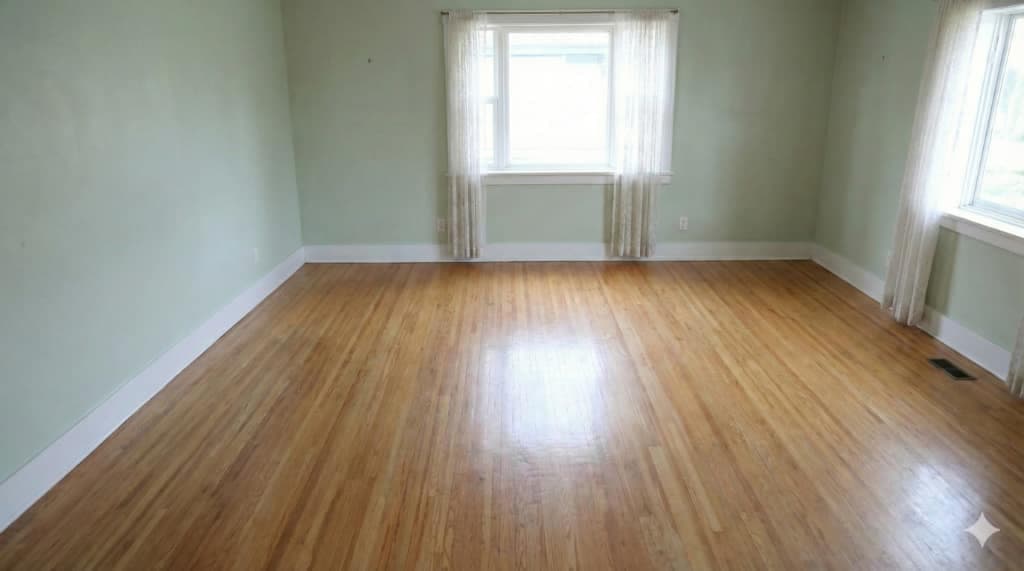
Decluttered
- Furniture Removalwhen a specific object is the problem: the vendor's enormous corner sofa, a wardrobe blocking a chimney breast, a rug hiding the floor.
- Room Declutter when the room is fine and the day it was photographed was not.
- Both to reach a shell you can restage. Declutter first, so the removal passes are not working around a pile of laundry.
Or ask for it in the conversation
The hero box on the home screen is a live chat with an interior-design agent, and it can run the styling tools for you. Ask for the sofa to come out of a photo and the agent runs Furniture Removal itself. It replies in a sentence or two, offers tappable options rather than making you type the next answer, and returns the finished image as the reply in the thread, not as a file you go and find. Renders made this way are kept in History.
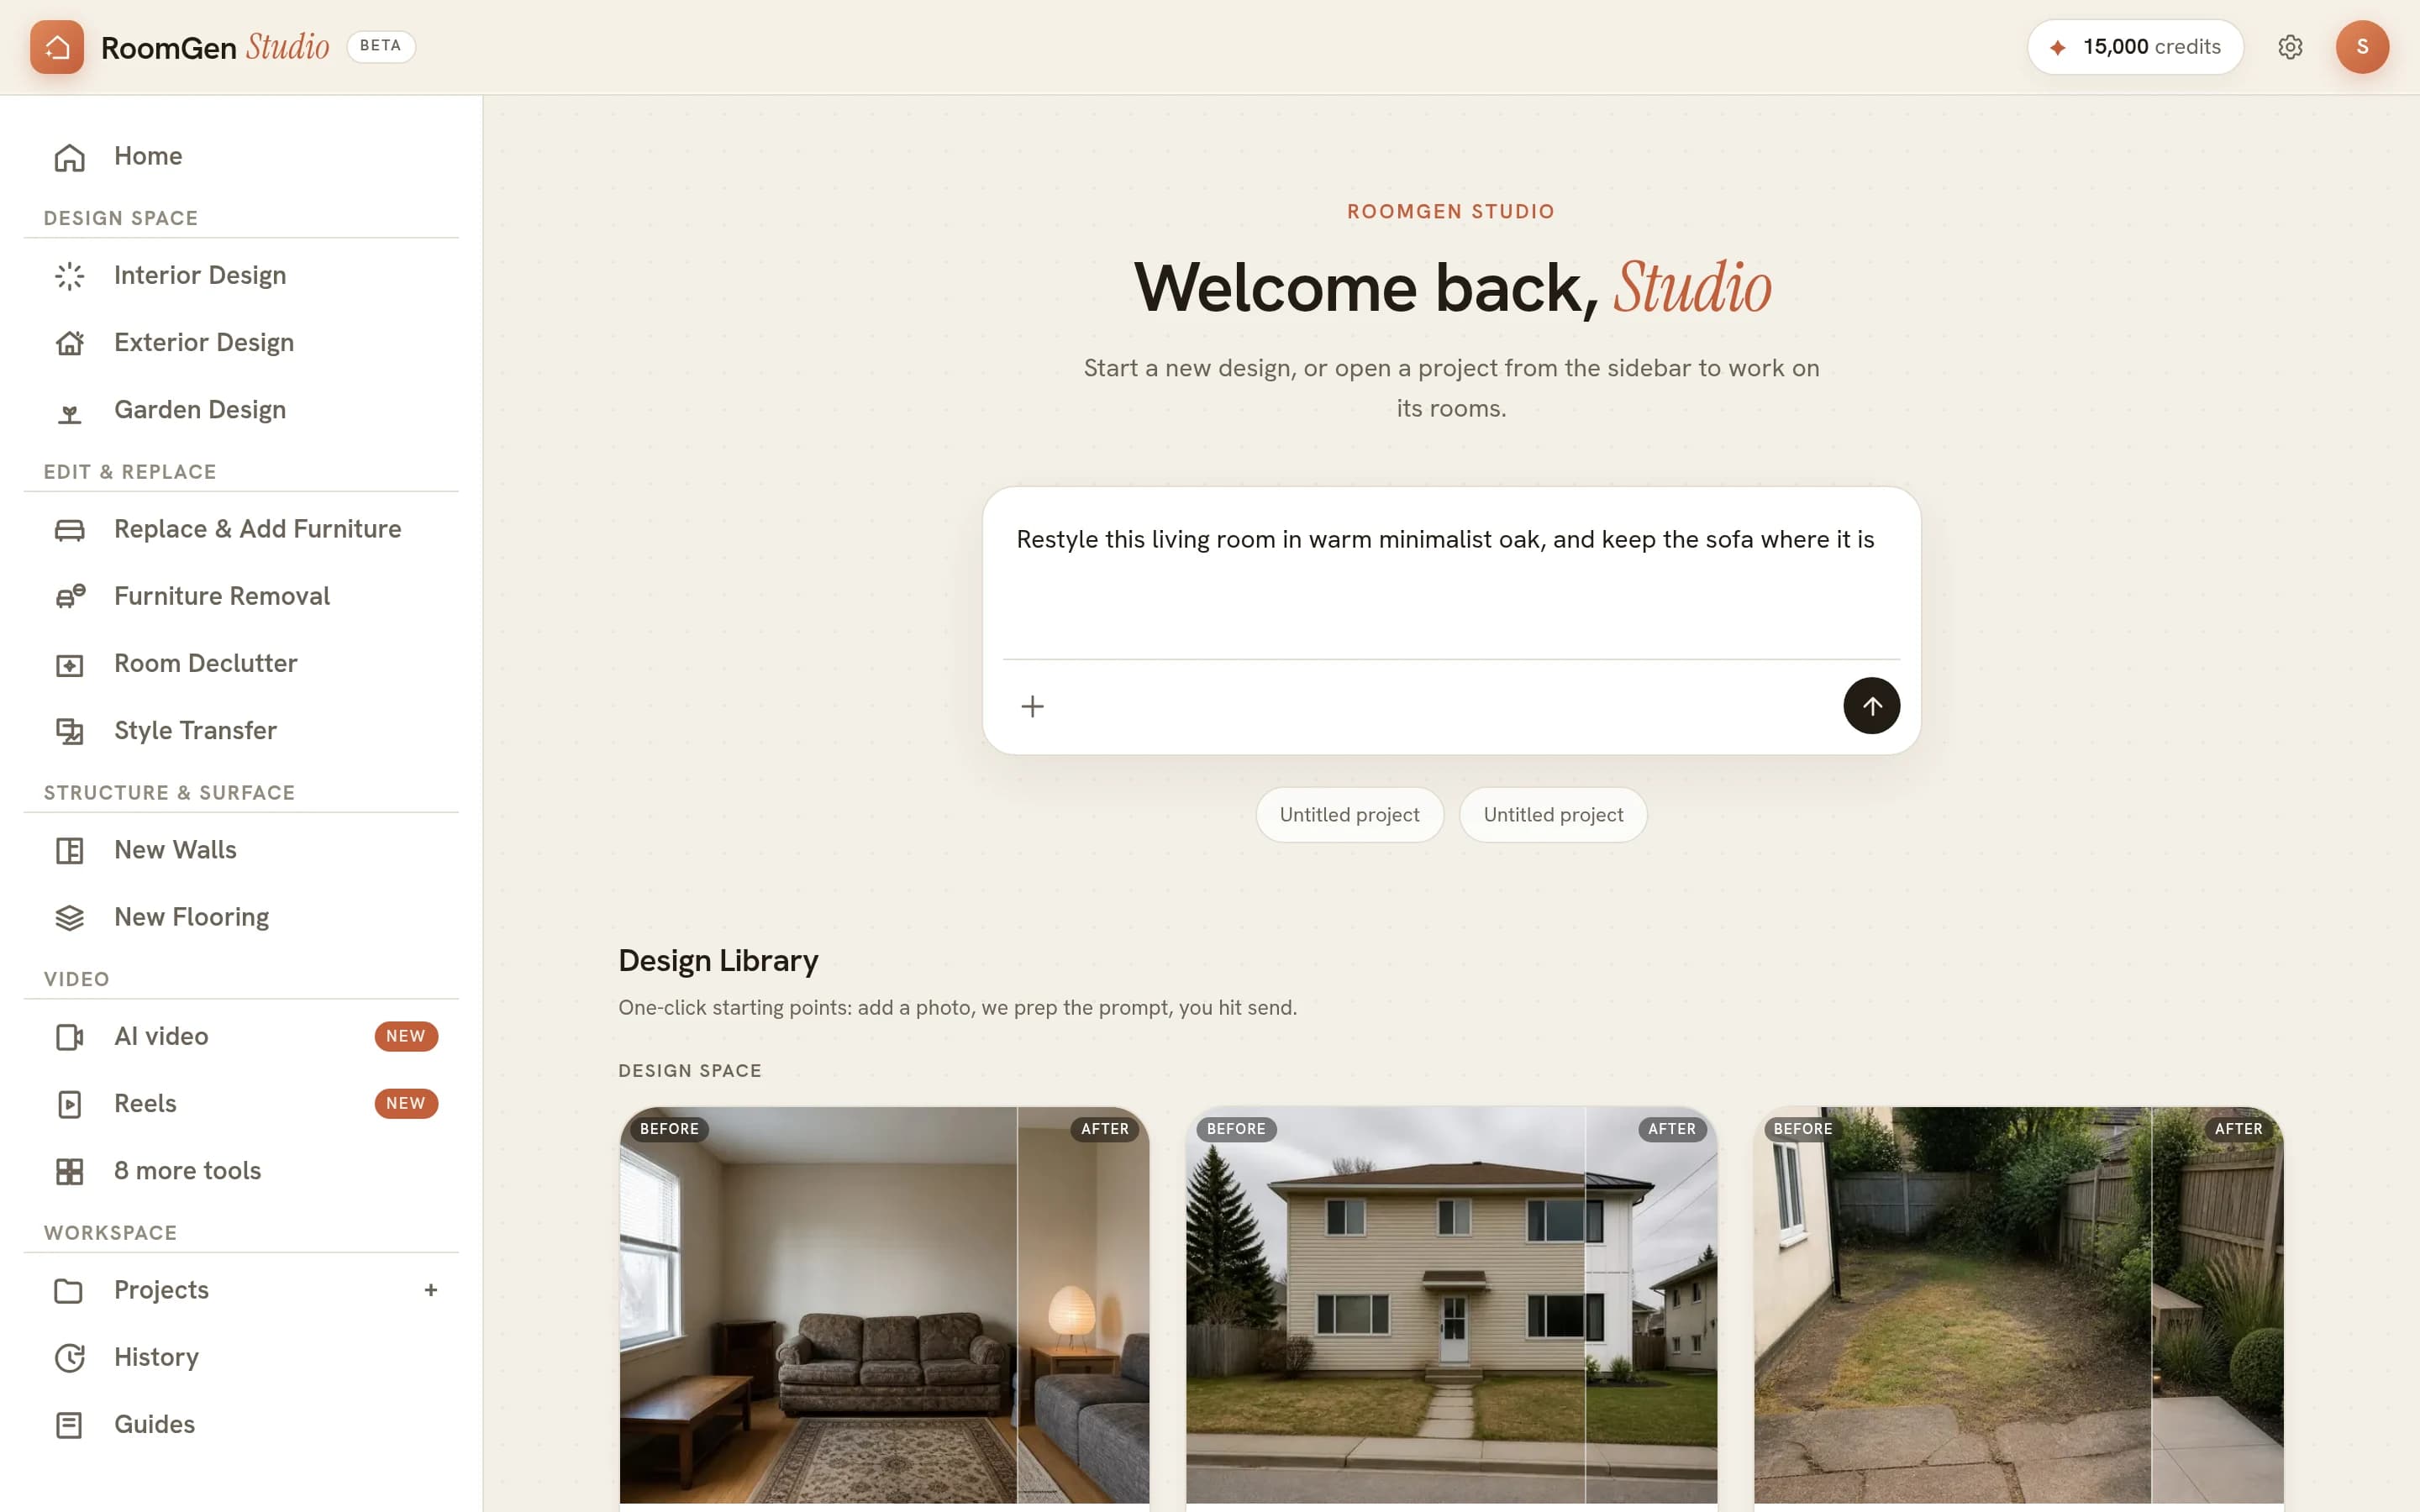
The conversation is also the easiest way to chain passes. Tapping an image in a chat opens a full-screen viewer with a strip of every image in that thread, so you can swipe between versions and reuse any one of them as the reference for the next prompt. Emptying a room becomes a sequence: sofa, then coffee table, then rug, each pass starting from the result of the last.
Phones get an Agent tab in the bottom bar, and the project screen is a sheet you pull up from the bottom, carrying the conversation, the source pills and the prompt bar. Nearly all of the studio works there, with the design canvas the one thing that wants a bigger screen, so shooting a room and stripping it before you leave the property is a reasonable way to work.
Where removal gets hard
The difficulty is never the object. It is everything the object was hiding, casting or reflecting, and all three fail in ways a quick glance misses.
- Surface that was never photographed. A sofa against a wall hides two metres of skirting board and the floor under it. Nothing in the file records that span, so the run continues the existing plank direction, tile grid, grout lines and wall colour across it. The result is a plausible reconstruction, not evidence: a socket or a patch of damage behind the sofa will not appear, because the photograph never knew about it.
- The shadow the piece cast. In low side light a sofa throws a long shadow across a rug, and the shadow has to go with it. A soft dark band lying on the floor where nothing stands is the most common tell in a bad removal. It lies away from the object, which is why a quick check misses it.
- Reflections. Mirrors, glazed cabinet doors, a dark television screen and a polished floor all hold a copy of the thing you just deleted. Open them at full size: a mirror still showing a removed wardrobe is the artefact a client spots from across the room.
Size sets the difficulty. A rug is nearly free: the floor around it says what it was covering. A wall-length wardrobe against patterned paper is the hard end, because most of the answer has to be invented. Given a choice of photographs, pick the one where the piece covers less.
A check before you send it
- Look at the floor where it stood. Whatever pattern the floor carries should run straight through the gap at the size it had before, with no visible seam where the piece used to sit.
- Follow the skirting board. One straight line along the wall, no kink, no step, no missing section where the piece met it.
- Find where the shadow fell. Then confirm it is gone, and that the shadows still in the room agree about the direction of the light.
- Open the reflective surfaces. Mirrors, glass and screens, at full size.
- Confirm nothing new arrived. No door, niche, vent or radiator that was not in the original photograph.
The empty room is the halfway point. Restaging is where sizes matter again, since a room emptied honestly and refurnished at the wrong scale helps nobody. See AI furniture placement for the dimensions worth checking, and virtual staging for home stagers for where the pass sits in a staging workflow.
One last thing for property work. An emptied photo makes a claim about what is in the room, so it carries the same disclosure any staged image does. Is virtual staging worth it covers that side of it, and bulk virtual staging covers a whole listing rather than one room.
Common questions
How do I remove furniture from a photo?
Upload the room as it stands, open Furniture Removal in the Designer library, name the piece you want gone, and press Remove it. The photo comes back without that piece, without the shadow it cast and without its reflection in glass or a polished floor, with everything else in the room left where it was.
What is the difference between Furniture Removal and Room Declutter?
Furniture Removal takes furniture out of the room: you name one piece and it goes. Room Declutter tidies the room without changing the design, so the clothes, boxes, cables and surface pile-up disappear while the sofa, the shelves and the rug stay exactly where they are. Declutter has no options at all, and removal asks you what to point at.
Can I empty a whole room, not just one piece?
Yes, by running removal more than once. Each pass names one thing, so a living room is usually the sofa, then the coffee table, then the rug. Tapping a result in a chat opens a viewer with a button to reuse that image as the reference for the next prompt, which is how you feed one emptied version into the next pass.
What does removing furniture cost in credits?
Each pass is a render, and renders are priced by quality: about 21 credits for a concept (at most 52), 50 for a preview, 70 for a standard render and 150 for a hero image. New accounts start with 100 credits. Emptying a furnished living room takes several passes, so budget per piece rather than per photo.
Why does the floor look wrong where the sofa used to be?
Because that part of the floor was never photographed. The model continues the plank direction, the tile grid and the wall colour across the cleared span, which is a plausible reconstruction rather than a record of what is there. The wider the piece and the more it hid, the more of the result is inferred, so check the cleared span at full size before the image goes out.
Try it on your own plan
Upload a floor plan or a room photo and see the first renders in about thirty seconds.
100 free credits · no credit card required
Get the next guide when it lands
We publish these as we work through what people actually ask about pricing, staging and turnaround. Leave an address to hear when a new one goes up.
Solo usamos tu dirección para escribirte sobre RoomGen. Política de privacidad · Términos