Add and replace furniture in a photo.
Replace & Add Furniture changes the pieces you name and leaves the rest of the photograph alone. Swap one sofa, add one rug, fill one empty corner, then stack those edits without the room turning into a different room.
One piece at a time, not one room at a time
The tool takes a single photo of a room as it stands and changes only the furniture you describe. Swap a sofa. Add a rug and a floor lamp. Put a reading chair in the corner beside the window. Anything you leave out of the description comes back exactly as photographed, which is what makes this useful for the small, specific edits a whole-room restyle has no way to express.
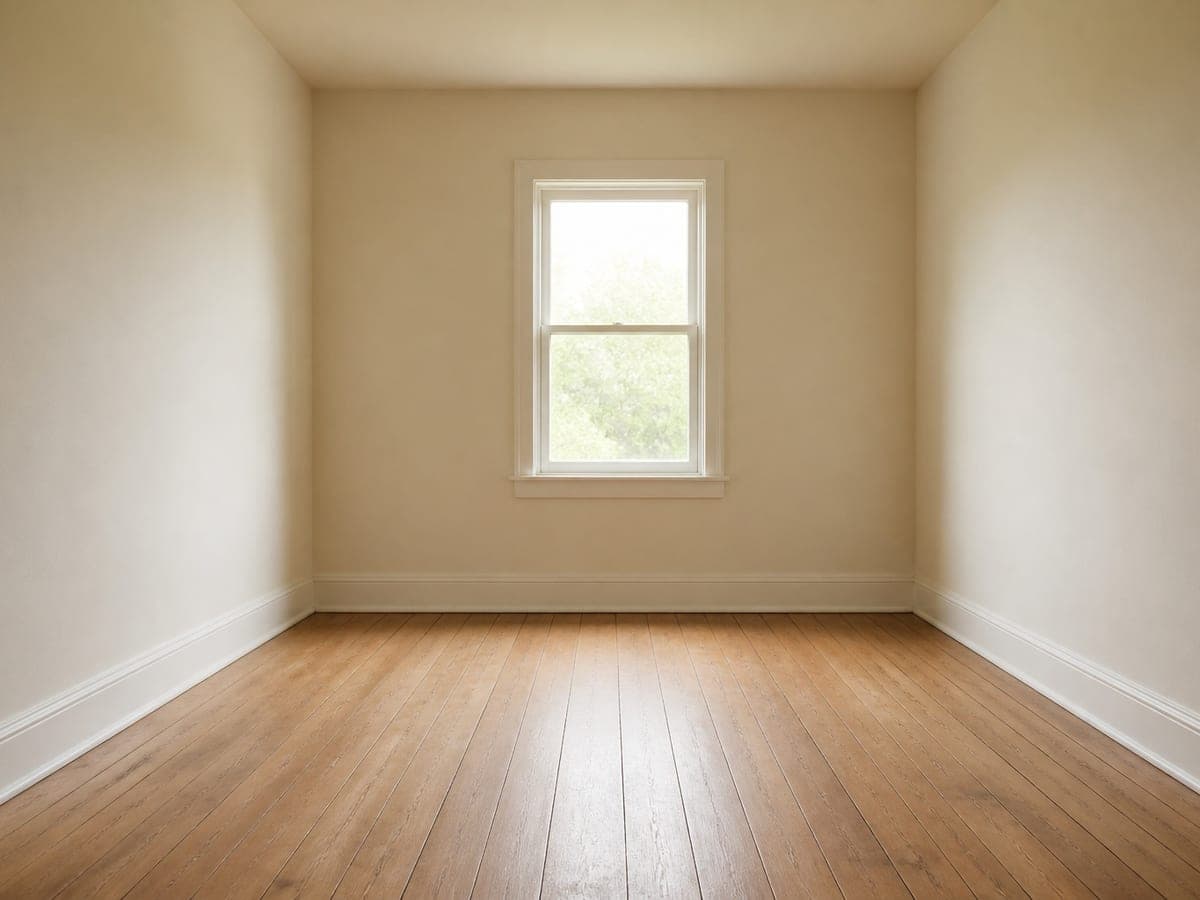 As shot, empty
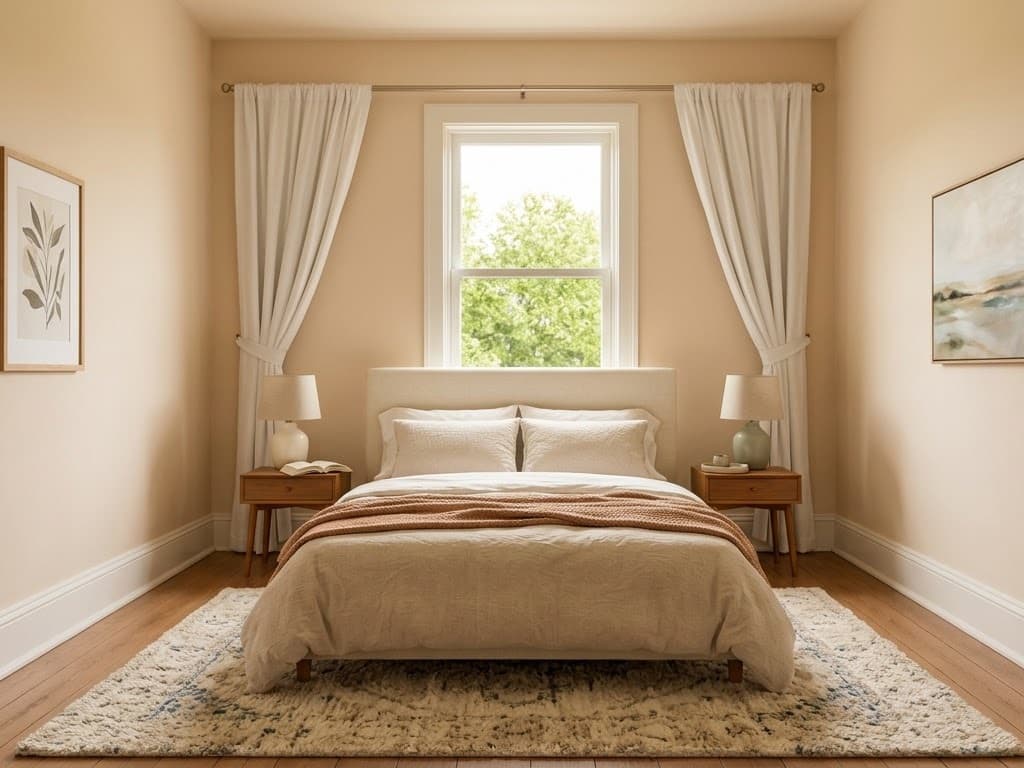 Furnished
That scoping is the whole difference. A restyle answers how a room could look. A piece-by-piece edit answers whether this sofa works in this room, against the walls, floor and daylight you actually have. The room stays yours, and only the furniture moves.
Writing the change so only the change happens
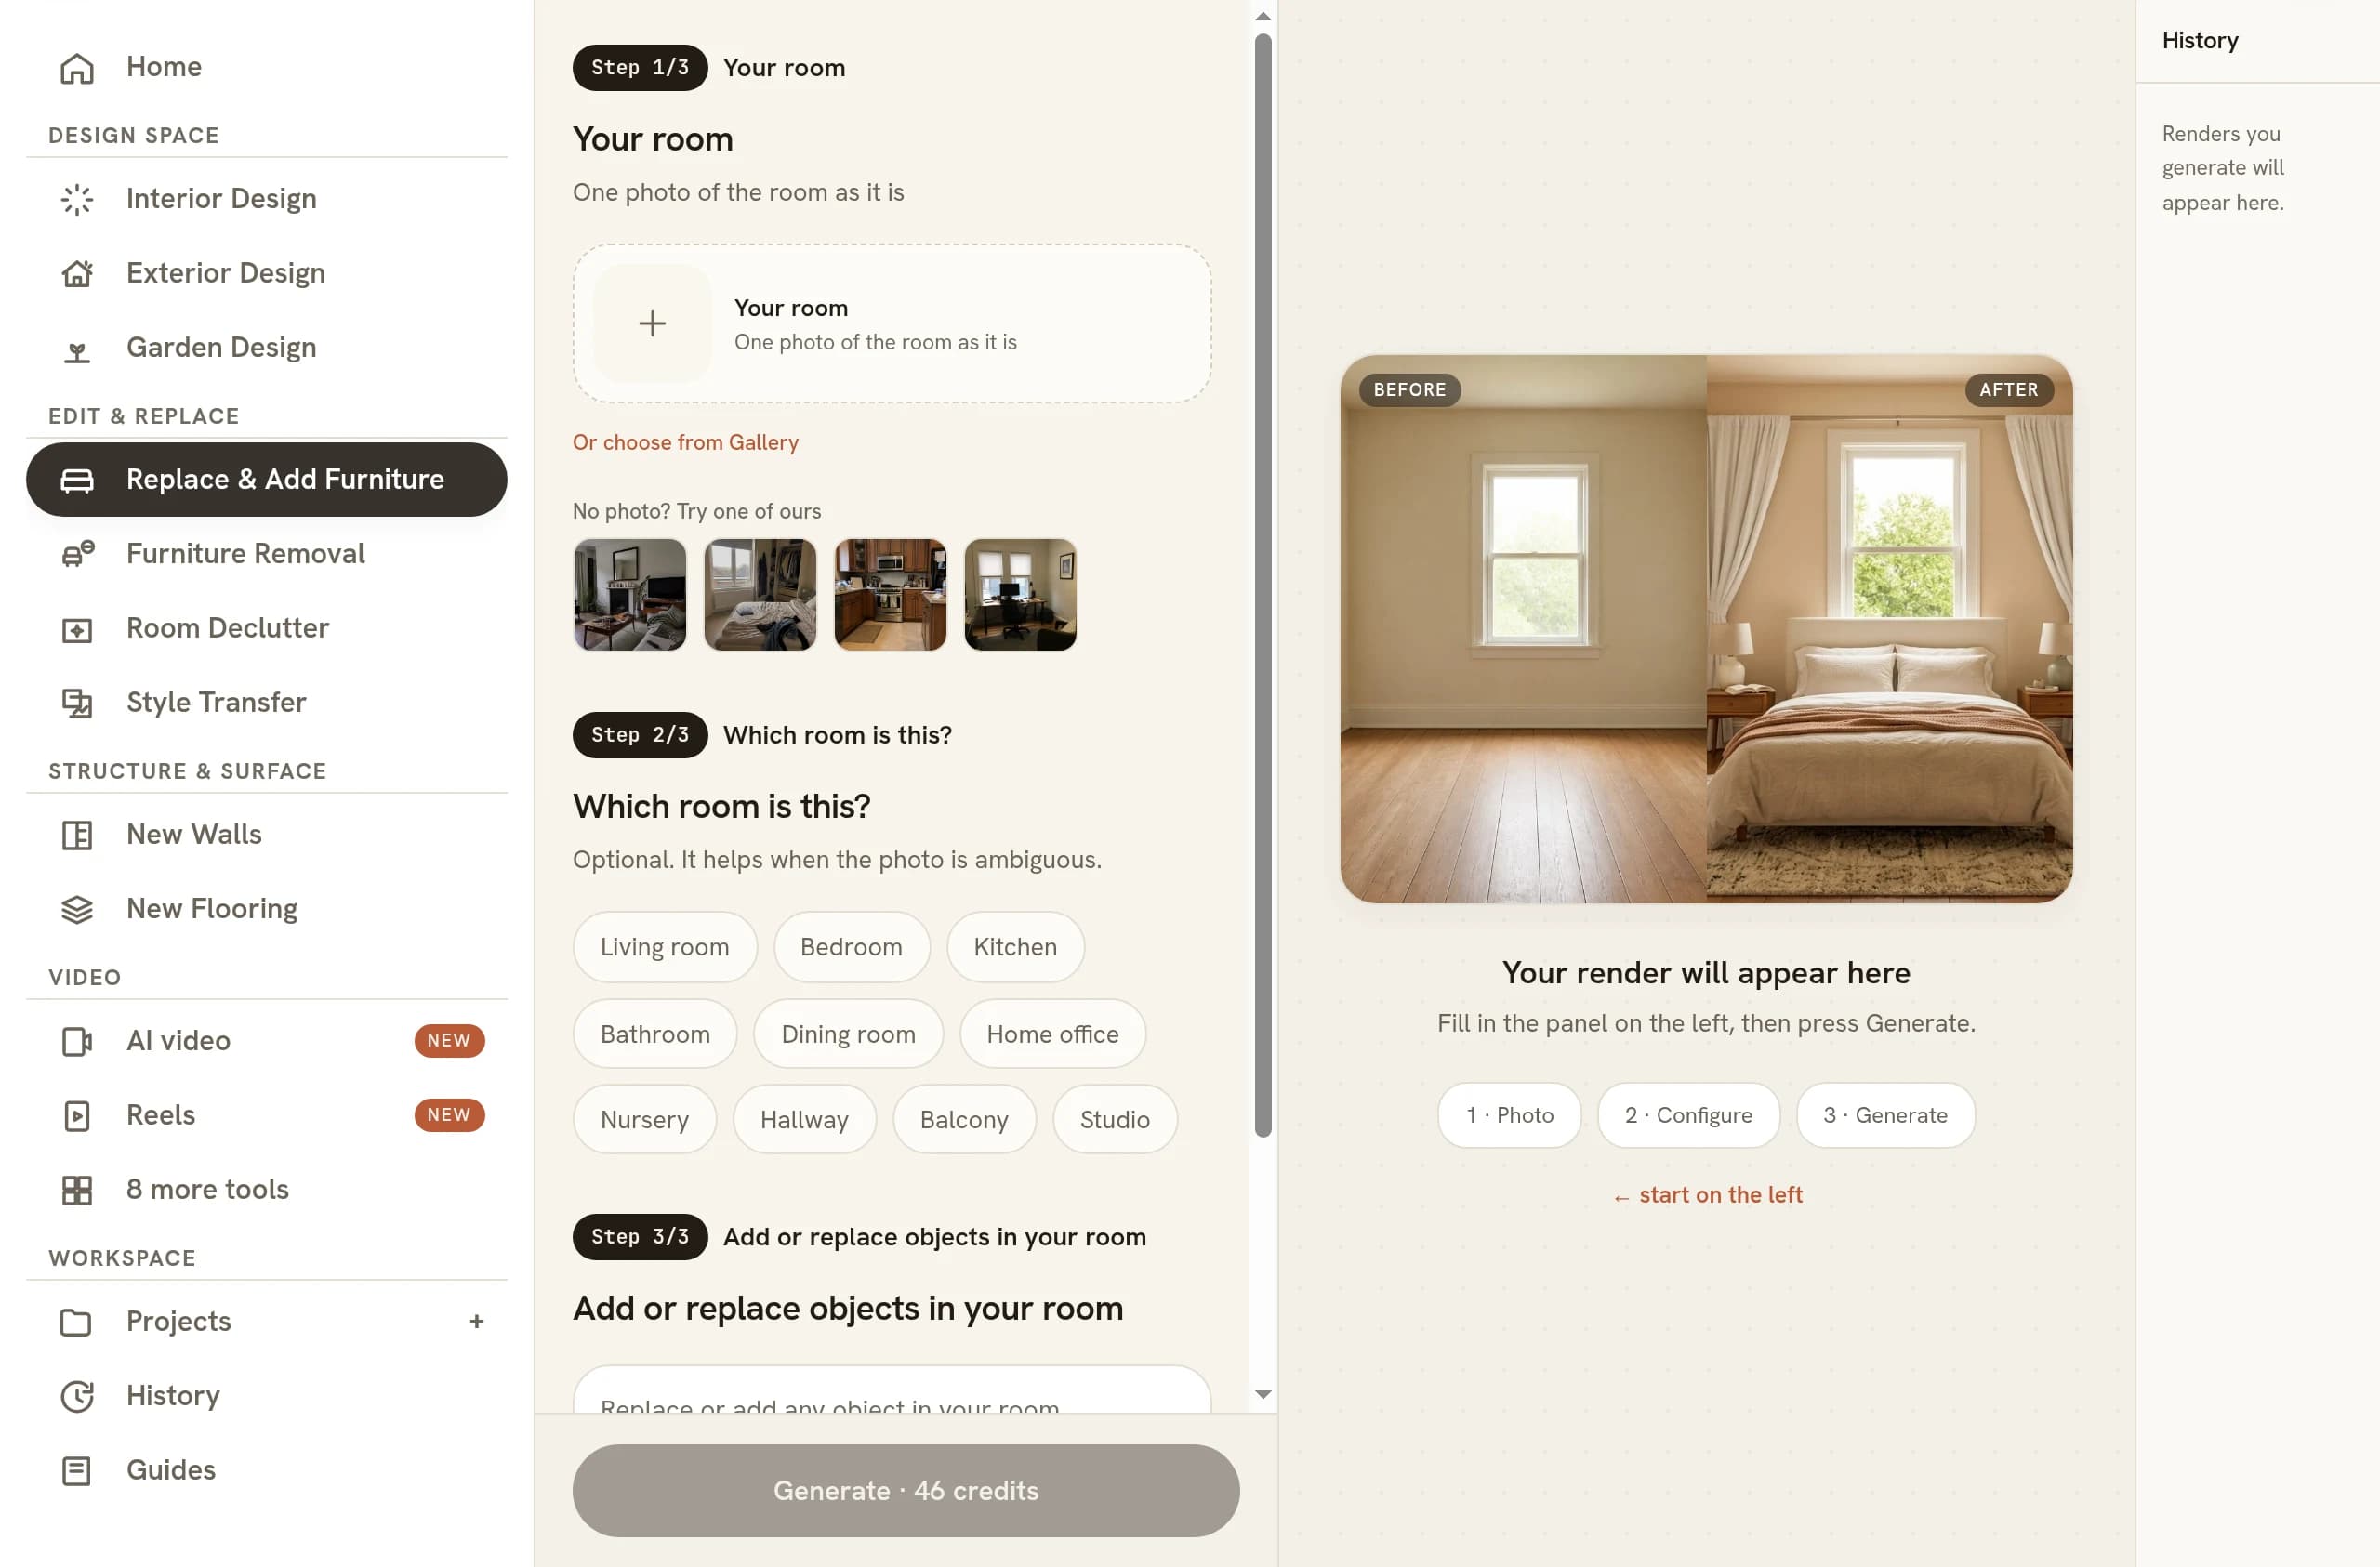
The description field is labelled add or replace objects in your room, and it is free text rather than a grid of style swatches for a reason. Warm contemporary is a look. Swap the sofa for a tan leather three-seater is not a look, and no set of twelve aesthetic thumbnails can say it. Three habits make the sentence behave.
- Name the object, then the property. Replace the sofa with a tan leather three-seater lands. Make the seating better does not, because it gives the model no object to hold on to.
- Say where, when the position matters. Add a wool rug under the coffee table places the piece. Add a rug leaves the placement to be guessed, and a guess is a thing you then have to correct.
- Keep the sentence about furniture. Adjectives aimed at the room, brighter or more modern or fresher, read as permission to restyle. That is when the finishes start moving on you.
The field opens with a suggestion already typed into it, and the shape of that suggestion is worth borrowing long after you have deleted the words. It does two jobs in one breath. First it sets out the furniture that should change, and then it fences off the parts of the room that have to survive the pass untouched. Build your own sentence on that frame. A description that states its own limits is far harder to misread than one that only says what you want.
If two changes are independent of each other, write them in one sentence and take them in one pass. Adding a rug and swapping the pendant do not interact, so there is nothing to gain by separating them. Fewer passes mean fewer chances for something you already liked to shift.
Stacking edits without the room drifting
A single edit is easy. A sequence is where rooms wander, because each pass works from the previous output rather than from your original photograph. Every generation is a fresh interpretation of the image it was handed, so the small differences it introduces become the starting point for the next one. Several passes in, the cushions have changed weave and the rug has crept out from under the bed.
Two habits keep that in check. Work large to small: the bed, the sofa or the dining table first, because the big piece sets the scale and the shadow direction everything after it has to agree with. Then the rug, which wants the large piece already standing on it. Then the lamps, then the art. A rug generated before the sofa arrives will be half covered by the sofa in the next pass, and the pattern you chose disappears under it.
Then save the version you like before you make the next change. Each pass produces a new image rather than an editable layer, so the sensible discipline is to keep the last good one and return to it when an edit makes the room worse. Trying to undo a bad change with another change stacks a third interpretation on top of a second. Going back to the checkpoint costs one render and no drift at all.
Filling an empty corner
An empty corner is the hardest brief in the set, because there is nothing in it to fix the scale of what you add. The model has the walls, the skirting line and whatever daylight reaches that part of the room, and from those it decides how tall a chair should be. Sometimes it decides generously, which is one of the reasons renders get scale wrong.
Name a neighbour and the guess narrows. Adding a reading chair and a slim floor lamp in the corner to the left of the window gives the instruction an anchor with a known position and a known size. The same logic sits behind most of the advice on AI furniture placement: furniture described in relation to something already in the photograph lands better than furniture described on its own.
Check the result against a fixture whose real height you know. A window sill, a door handle and a skirting board are all fixed measurements hiding in plain sight, and a chair back that overshoots the sill by a foot is easier to catch that way than by eye.
What to check before you send it
Look at the floor first. A piece that has been added rather than integrated tends to float, and the giveaway is the contact shadow, the small dark seam where a leg meets the boards. If the legs sit on the floor with no shadow beneath them, that pass is not usable, whatever else it got right.
Then open the original alongside it and read the half of the frame you did not mention. The window frame, the door, the skirting run and the wall finish should land in the same pixels. Structural changes are ruled out by the instruction, so a window that has moved or gained a pane is a signal the description asked for too much at once. Split it and run it again.
Last, count. Two bedside tables should still be two, and a room that came back with a fourth dining chair has quietly answered a question you did not ask. It is worth deciding in advance whether a piece is worth staging at all before you spend three passes perfecting a lamp nobody will look at.
When another tool fits better
Replacing furniture and clearing it out are different jobs. If the room is full of somebody else's belongings and you want it bare, Room Declutter is the tool for that, and the guide on removing furniture from a photo covers where the empty version stops being believable. If you are holding a product photograph of an actual sofa you can buy, See it in my room places that specific piece rather than something like it. And a change to a floor, a worktop or a wall finish belongs in Swap one thing, which is built to move a surface and nothing else.
Scale changes the calculation too. One room takes a handful of passes, and a full listing does not, which is the case for bulk virtual staging instead. Once a room is furnished the way you want it, the finished frame is also the input for a short staged walkthrough, which reuses the work rather than starting the room again.
Common questions
Can I add furniture to a photo of an empty room?
Yes, and an empty room is the simplest case. With no existing furniture to preserve, the tool furnishes the space plausibly for its shape and keeps the shell it was given: the same walls, window, floor and daylight. You can accept that first pass wholesale or name the pieces you want instead.
What photo do I need for virtual staging?
One photo of the room as it is, taken straight on, with the floor visible from wall to wall. Corners help, because they tell the model where the room ends. Shoot in daylight if you can, hold the camera at chest height, and keep the whole of any wall you plan to place furniture against inside the frame.
Can I change the wall colour at the same time as the furniture?
Yes, but you have to name it. Finishes hold unless your description mentions them, so walls, flooring and ceiling stay as photographed while the furniture changes around them. Write the finish into the same sentence when you do want it moved, for example painting the walls a soft clay and adding a walnut sideboard.
Does virtual staging work on a phone photo?
It does. A modern phone camera gives plenty of resolution, and the ultrawide lens is genuinely useful in small rooms. Two things matter more than the camera: even light, so no single lamp blows out one half of the frame, and a steady straight-on angle rather than a tilted one shot from the doorway.
Do I have to disclose that a listing photo is virtually staged?
Disclose it, and check your own portal's rules, because listing platforms and agency codes of practice commonly ask for staged images to be labelled. The caption costs nothing while an unlabelled one invites a complaint. Staging shows how a room could be furnished, so keep the walls, windows and floor honest and never stage away a defect a buyer would want to see.
Try it on your own plan
Upload a floor plan or a room photo and see the first renders in about thirty seconds.
100 free credits · no credit card required
Get the next guide when it lands
We publish these as we work through what people actually ask about pricing, staging and turnaround. Leave an address to hear when a new one goes up.
Solo usamos tu dirección para escribirte sobre RoomGen. Política de privacidad · Términos