A listing tour reel through the rooms you rendered.
Listing tour, one of the Reels templates in RoomGen Studio, takes three to six renders of one property and turns them into a single eight-second vertical walkthrough that visits the rooms in the order you choose. The stops are your own renders, with only the camera moving, so the tour is made of views you or your client have already approved.
Updated · RoomGen Studio
What the Listing tour template makes
Listing tour makes one vertical walkthrough film of a property from the renders you already have. It is one of the nine Reels templates in RoomGen Studio. The others each run on a single render or a floor plan. This one joins several renders of the same home into one walk. You choose them in the order a visitor would see them, and the tour runs from the arrival to the last room.
What sets it apart for a designer is what it leaves out. Other templates make keyframes, stills of the same space in another state, such as a bare shell or a box on the floor, and ask you to review those stills before any video is made. Listing tour makes none. The renders you or your client approved are the stops, and only the camera moves through them. The reel, the presentation and the brochure all show the same rooms, and there are no keyframes to check or pay for.
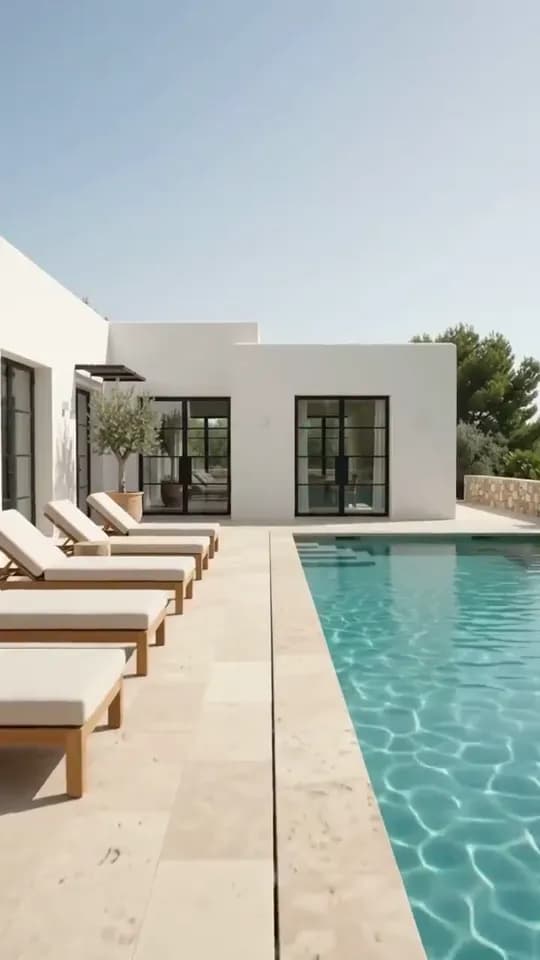
1 · Terrace
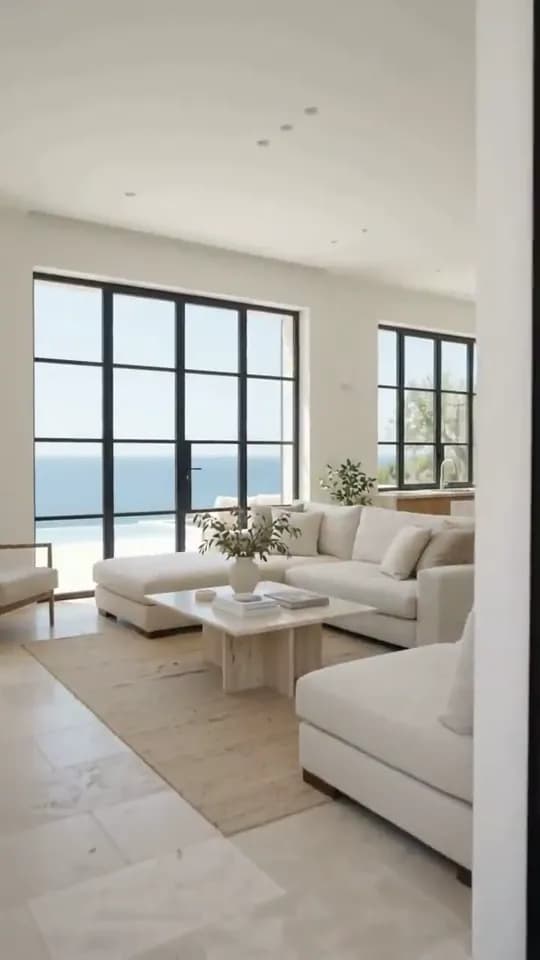
2 · Living
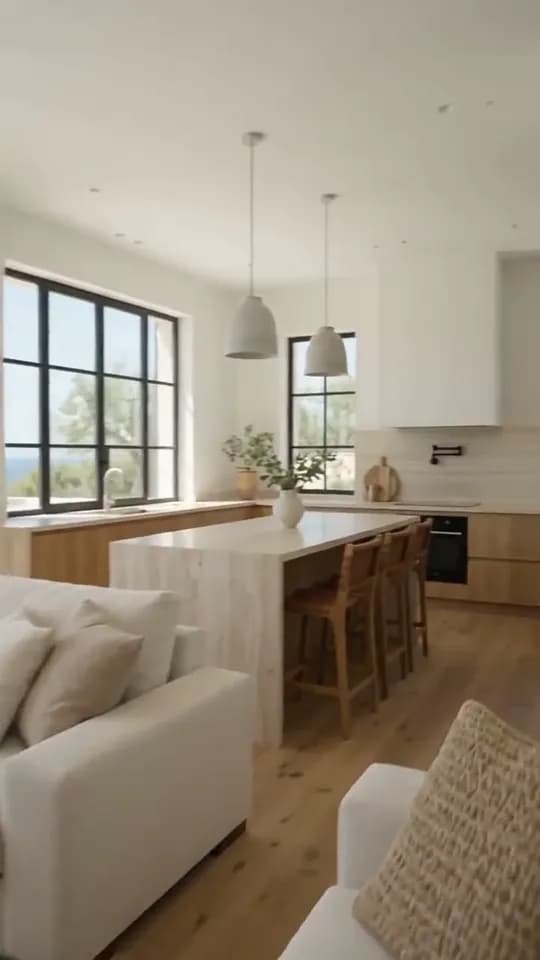
3 · Kitchen
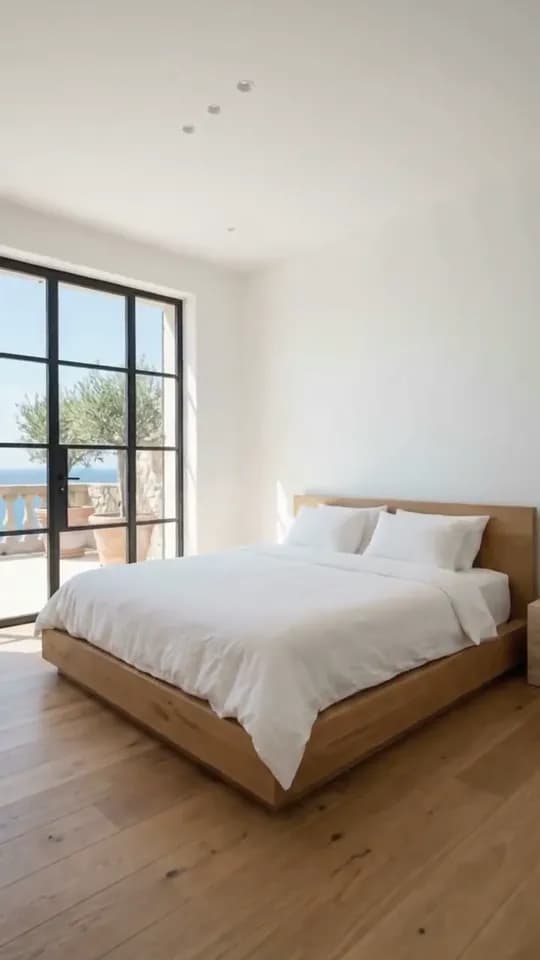
4 · Bedroom
The fixed parts of the template fit in a short table.
| Listing tour | What you get |
|---|---|
| Starts from | Three to six renders of one property, all from the same project |
| Order | The order you pick them in, arrival first |
| The rooms | Your renders, as numbered stops |
| Keyframes | None, so no keyframe charges |
| Output | One MP4: 8 seconds, 720p, 9:16 vertical |
| Cost | One clip, the same for any number of stops, with the exact total on the Generate button |
| Access | Paid plans; the sample project lets you walk through the steps free, with a sample clip from another template |
Which renders make a good listing tour
Start with renders that look like one visit. Views set at the same time of day, with the same sky through the glass, read as a single walk through the house. All four stops in the preview share the same clear daylight, and that does much of the work of making the terrace, the living room and the bedroom feel like one home. If one of your renders is at dusk and the rest are at midday, relight the odd one out before you put it in the tour.
Choose views with depth, where the room recedes away from the camera. They give each stop space to move in. A tight close-up of a bedside table gives the tour very little to work with and tends to feel like a jump. Details that repeat from room to room help as well. In the preview, the black steel-framed glazing turns up at every stop, and pale oak and cream fabrics recur throughout.
Those repeated details count most where something else changes. Between the second and third stops of the preview, the floor goes from travertine tiles in the living room to wide oak boards in the kitchen. It is the glazing, the palette and the light that tell the viewer they are still in the same house. Given the choice, neighbouring stops that share a floor finish read more clearly as one space.
Then check the crop on every render, not only the first. Every reel is 9:16, so any render wider than that keeps its full height and loses its sides. A 16:9 render keeps roughly the middle third of its width, a 4:3 render about 42%, and a square one about 56%. A 9:16 portrait render is used whole. For a landscape view, cover the outer thirds with two fingers. If the sofa, the island or the bed is still in the strip that remains, the stop will work. If the room’s best feature sits at the edge, choose another view of that room.
Finally, decide how many stops you really need. The length is fixed, so every stop you add shortens the time on each room. Four, as in the preview, gives each space a clear moment. Six suits a quick sweep of a larger home, where the point is the sense of space rather than any one room.
Putting the stops in order
The order you pick is the order of the tour, so pick the way a buyer would walk. Arrival goes first: the approach, the front door, the entrance hall or, as in the preview, the pool terrace a visitor steps out onto. From there, follow the plan. Living space, then kitchen, then bedrooms works because it is how people move through most homes. A tour that leaves the kitchen for an upstairs bedroom and then comes back down to the dining room feels lost, however good the renders are.
Rooms that can be seen from one another make the strongest neighbours. An open-plan living room followed by its kitchen feels like a few steps across the house. A bathroom followed by the garden feels like a cut, even when both renders are strong.
End on the room that sells the property. The last stop is where the clip finishes, and it is the frame people remember. The preview ends in the bedroom, with a glass door onto a terrace and the sea beyond, which closes the tour on the view the whole house is arranged around. A principal suite, a garden or a roof terrace usually does the same job.
How to make a listing tour reel in RoomGen Studio
A tour takes two choices, then the wizard’s four screens: Frames, Settings, Generate and Result. With this template, the Frames screen shows your own renders rather than new stills.
- Open Reels and choose Listing tour. Reels sits in the VIDEO group of the studio sidebar. Pick Listing tour from the template panel, or press Expand to browse the full library at full size.
- Pick the renders in tour order. Choose the renders of the property from one project, starting with the arrival. If you mix projects, Reels refuses the set before the wizard opens, with the note “Pick renders from one project: a tour is one property.”
- Frames: check the numbered stops. Your renders appear in the order you picked them, each marked “Kept exactly as it is. Only the camera moves.” There is nothing to generate on this screen.
- Settings: check the price. There is no length or resolution to set, because every tour is eight seconds at 720p. The Generate button shows the exact credit total, and the chip beside it shows how many tours at that price your balance can pay for.
- Generate, then collect it on Result. Press Generate. The finished MP4 is saved to the project’s Gallery, ready to download.
Nothing is spent on video until you press Generate, so the numbered stops are the moment to catch a mistake: a render in the wrong place, the wrong view of a room, or a stop that will not survive the crop. You can also close the wizard part way through. Reels offers a resume card when you come back, and anything already paid for is kept.
Where a listing tour reel earns its place
The template suits anyone who holds a set of renders for a whole home and needs it seen on a phone.
- Off-plan and new-build sales. When the home is not built yet, renders are all there is to show, and a tour gives buyers a sense of moving through it rather than paging through stills.
- Staged listings. Agents and home stagers who have furnished the rooms of an empty property as renders can walk viewers through the result. The approach in virtual staging for home stagers covers staging those rooms first.
- Whole-house presentations. A designer showing a client the full scheme can let them see how the palette carries from room to room, which a grid of stills does less well.
- Your own feed. Architects and designers get a finished project in a shape made for a phone, using renders they already have.
Because the stops come from renders you already have, a tour asks for no new design work. For a single room, animating one render with a camera move is the simpler tool. If the home only exists as a plan so far, the blueprint build reel turns the plan itself into the video. And if you are working from photographs of a finished property rather than renders, video for real estate listings is the better fit.
Posting the tour
The downloaded MP4 is already vertical, the shape Instagram Reels, TikTok and YouTube Shorts are built around. Music, captions and text overlays go on in the app you post from. Before you publish, watch the tour once at full size and check each room against its render.
Eight seconds across several rooms leaves no time for a label per room. Use one line for the whole clip instead, such as the development name and the word visualisation. Keep it clear of the top and bottom of the frame, where each app lays its own buttons and captions over the video. If the app lets you choose a cover, pick the arrival stop. It tells a scrolling viewer what kind of property this is.
What Listing tour will not do
It will not show a room you have not rendered. A tour is only as complete as your set of renders, so a bathroom or a garden that was never rendered stays out of it.
It will not guarantee a perfect match. Your renders are the stops, but the clip is still generated video, so a detail can come out differently from the render it started from. That is what the full-size check before posting is for.
It is design intent, not a record of the building. The rooms are renders, and the route between them is a film of your chosen views rather than a measured walk through the real plan. A viewer can come away with the wrong idea of how the rooms connect. Order the stops the way the plan actually runs, and label the reel as CGI or a visualisation. That matters most for a property on the market, where a buyer may take anything that looks like a walkthrough as evidence of the finished home. Post it alongside the real photographs and the floor plan.
A good first tour is three renders that share their light, taken in the order you would walk a client through the door. Once that one reads as a single visit, add stops.
This guide is kept by the RoomGen Studio team and describes Reels as it works on 28 September 2026. You can read more about RoomGen Studio and how the team works.
Common questions
How many renders can a listing tour include, and how long is it?
Between three and six renders of the same property, all from one project, picked in the order the tour should visit them. Renders from a different project are refused, because a tour is one property. The reel is always 8 seconds at 720p in a 9:16 vertical frame, whatever the number of stops, so every stop you add shortens each room’s time on screen. For a larger home, make two tours, such as the living spaces and then the bedrooms, and post them as a pair or join them in the app you post from.
Will Listing tour change anything in my renders?
The tour is saved to the project’s Gallery as its own MP4, alongside the renders it was made from. Inside the tour, each stop is one of your renders with only the camera moving, so the furniture, finishes and light come from the scheme you signed off. Two things can still differ from the originals: any render wider than 9:16 is cropped to the vertical frame, and the clip is generated video, so a detail can come out differently. Check each room against its render before the tour goes to a client.
How much does a listing tour reel cost, and can I try it first?
Listing tour has no keyframes, so the only charge is the tour itself: one clip, the same for any number of stops. Prices can change, so go by the Generate button on the Settings step. It shows the exact total before you commit, and the chip beside it shows how many tours at that price your balance can pay for. Reels is on paid plans. You can walk through the steps first on the free sample project in RoomGen Studio, from the numbered stops to Settings, Generate and Result, but the clip it returns is a sample from another template, not a tour of the renders you picked. The preview on this page shows what Listing tour itself makes.
What if the finished tour comes out wrong?
A finished tour has no redo button. Retry only appears when a clip fails outright rather than finishing. To try again, start a new Listing tour from your renders. That is a fresh run, charged again at the price the Generate button shows, so change something first. If the route jumps, reorder the stops to follow the plan. If one room drifts from its render or crops badly, swap in a deeper view of that room with its subject in the middle third of the width, or drop that stop as long as the tour still has three or more.
Can I use a listing tour reel to market a property for sale or rent?
Yes, as long as it is presented as a visualisation. The rooms are renders, and the route between them is a film of chosen views, not a survey of the building. Caption the reel as CGI or a design visualisation, post it alongside the real photographs and the floor plan, and check what the advertising rules in your market expect for computer-generated images. For an off-plan or new-build home, say that the rooms show the proposed design.
Try it on your own plan
Upload a floor plan or a room photo and see the first renders in about thirty seconds.
100 free credits · no credit card required
Get the next guide when it lands
We publish these as we work through what people actually ask about pricing, staging and turnaround. Leave an address to hear when a new one goes up.