Animate a finished render.
Motion adds nothing to a room that the still did not already contain. Pick the camera move, and the whole job becomes choosing which of your renders has enough behind it to survive being travelled through.
What motion does to a still
Animating a render moves the camera and nothing else. The sofa stays where it was, the materials keep their colour, and the light coming through the window holds the temperature it had in the source frame. That is the promise of the tool, and it is also the constraint that quietly decides which of your stills are worth animating at all. A camera cannot visit a corner your render never showed.
So the useful question is not which move looks best in the abstract. It is which frame you own has enough depth, enough air and enough correctness to be moved through. A still that reads perfectly at rest can come apart the moment the viewpoint leaves its original position, and the reasons are almost always visible before you generate anything.
It helps to think of the still as a set rather than a picture. Everything in frame has a position in space, and a camera move is a claim about how those positions relate to each other. Where the image is confident about depth, the move feels shot. Where it is vague, the move has to guess, and a guess is what viewers read as artificial.
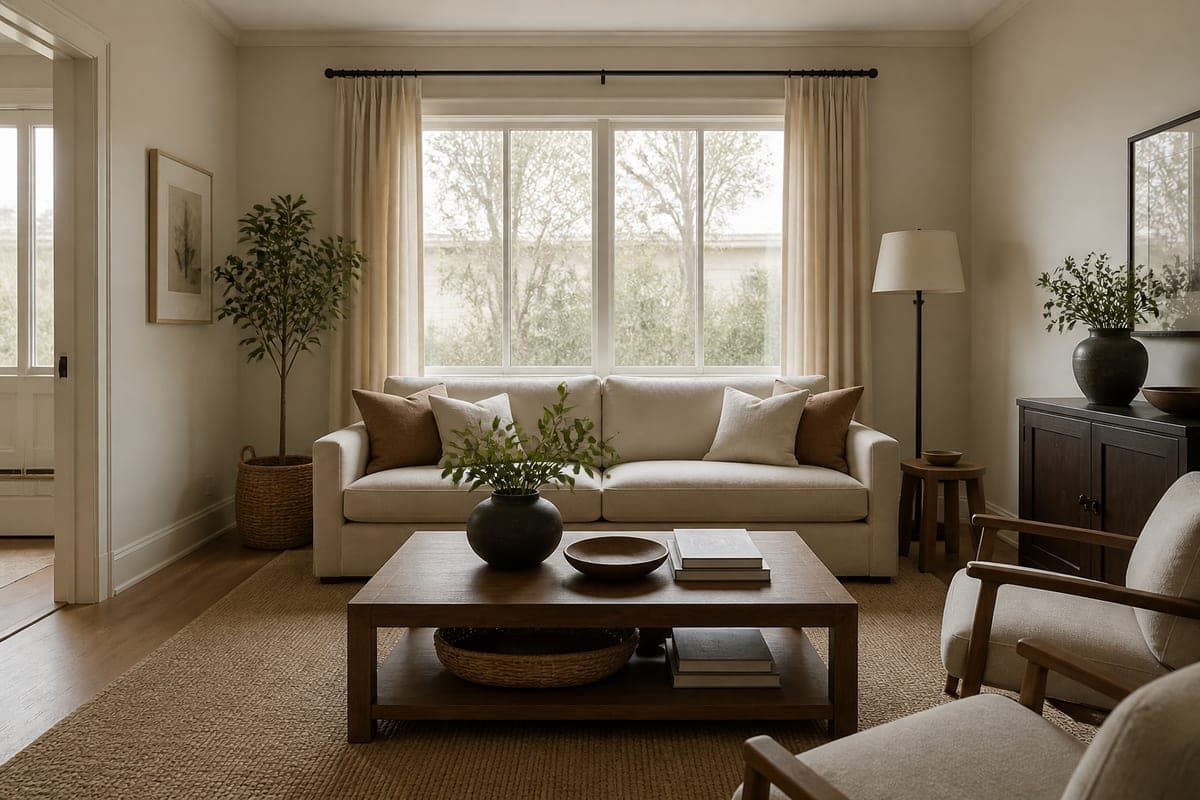 Flat daylight
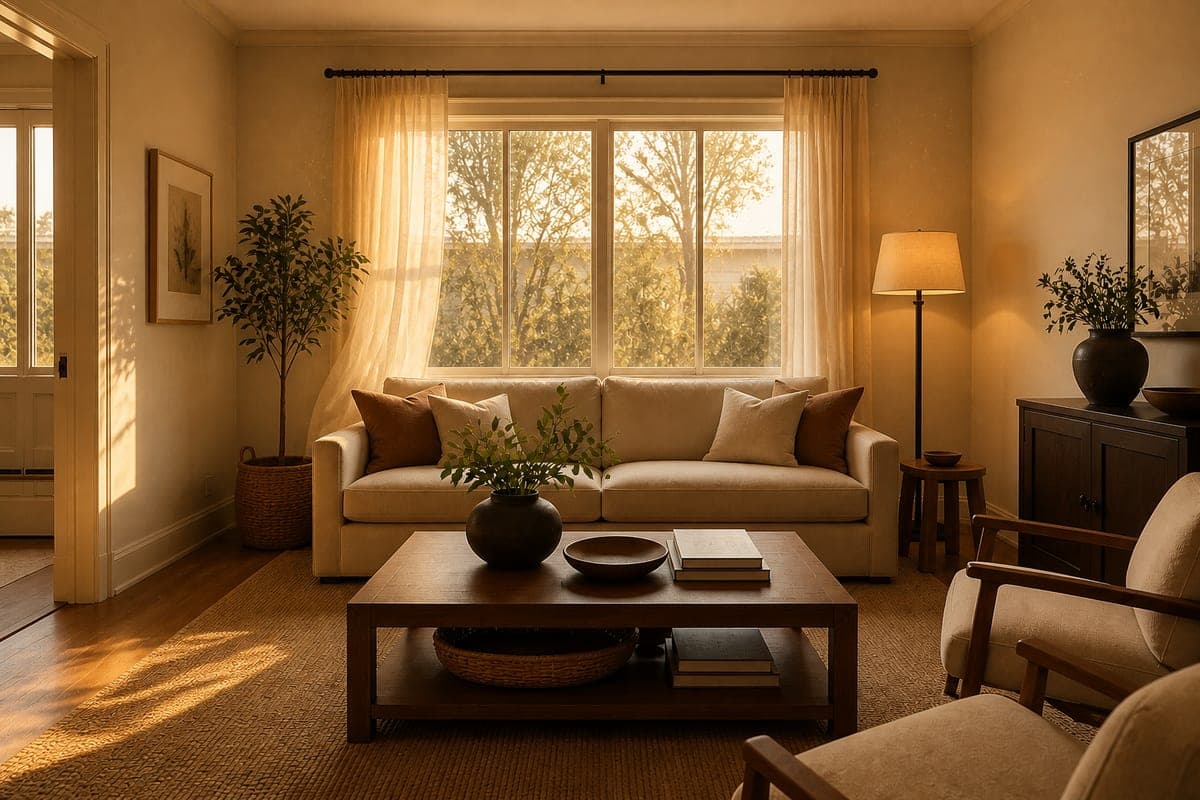 Settled light
Match the move to what the frame contains
Eight preset moves are offered: push in, pull back, orbit left, orbit right, pan across, rise up, descend and walk in. Each asks the still for something different. Choosing the one your frame can actually pay for is most of the work, and it takes a few seconds of looking.
Read the still the way the camera will have to. Ask what sits nearest the lens, what sits behind it, and how much room there is on each side before the composition runs out. A frame with an answer to all three takes any move you give it. A frame with an answer to only one wants the single move that respects its limits.
- Push in and walk in. Both need clear depth ahead of the camera and something worth arriving at: a fireplace, a bed, a window with a view. A wall-on elevation has nowhere to go.
- Pull back and rise up. Both need the room to make more sense as it opens out. Use them on a frame that was composed a little wide, never on one cropped tight against the furniture.
- Orbit left and orbit right. The most demanding pair, because an arc only reads when near and far objects separate as the view turns. A frame with everything at one distance rotates into mush.
- Pan across. The gentlest, and the safest on a difficult still, because the camera holds its position. It needs content spread laterally: a run of joinery, a bank of windows, a picture wall.
- Descend. Wants a floor worth landing on. A good rug, a patterned tile, a considered furniture layout.
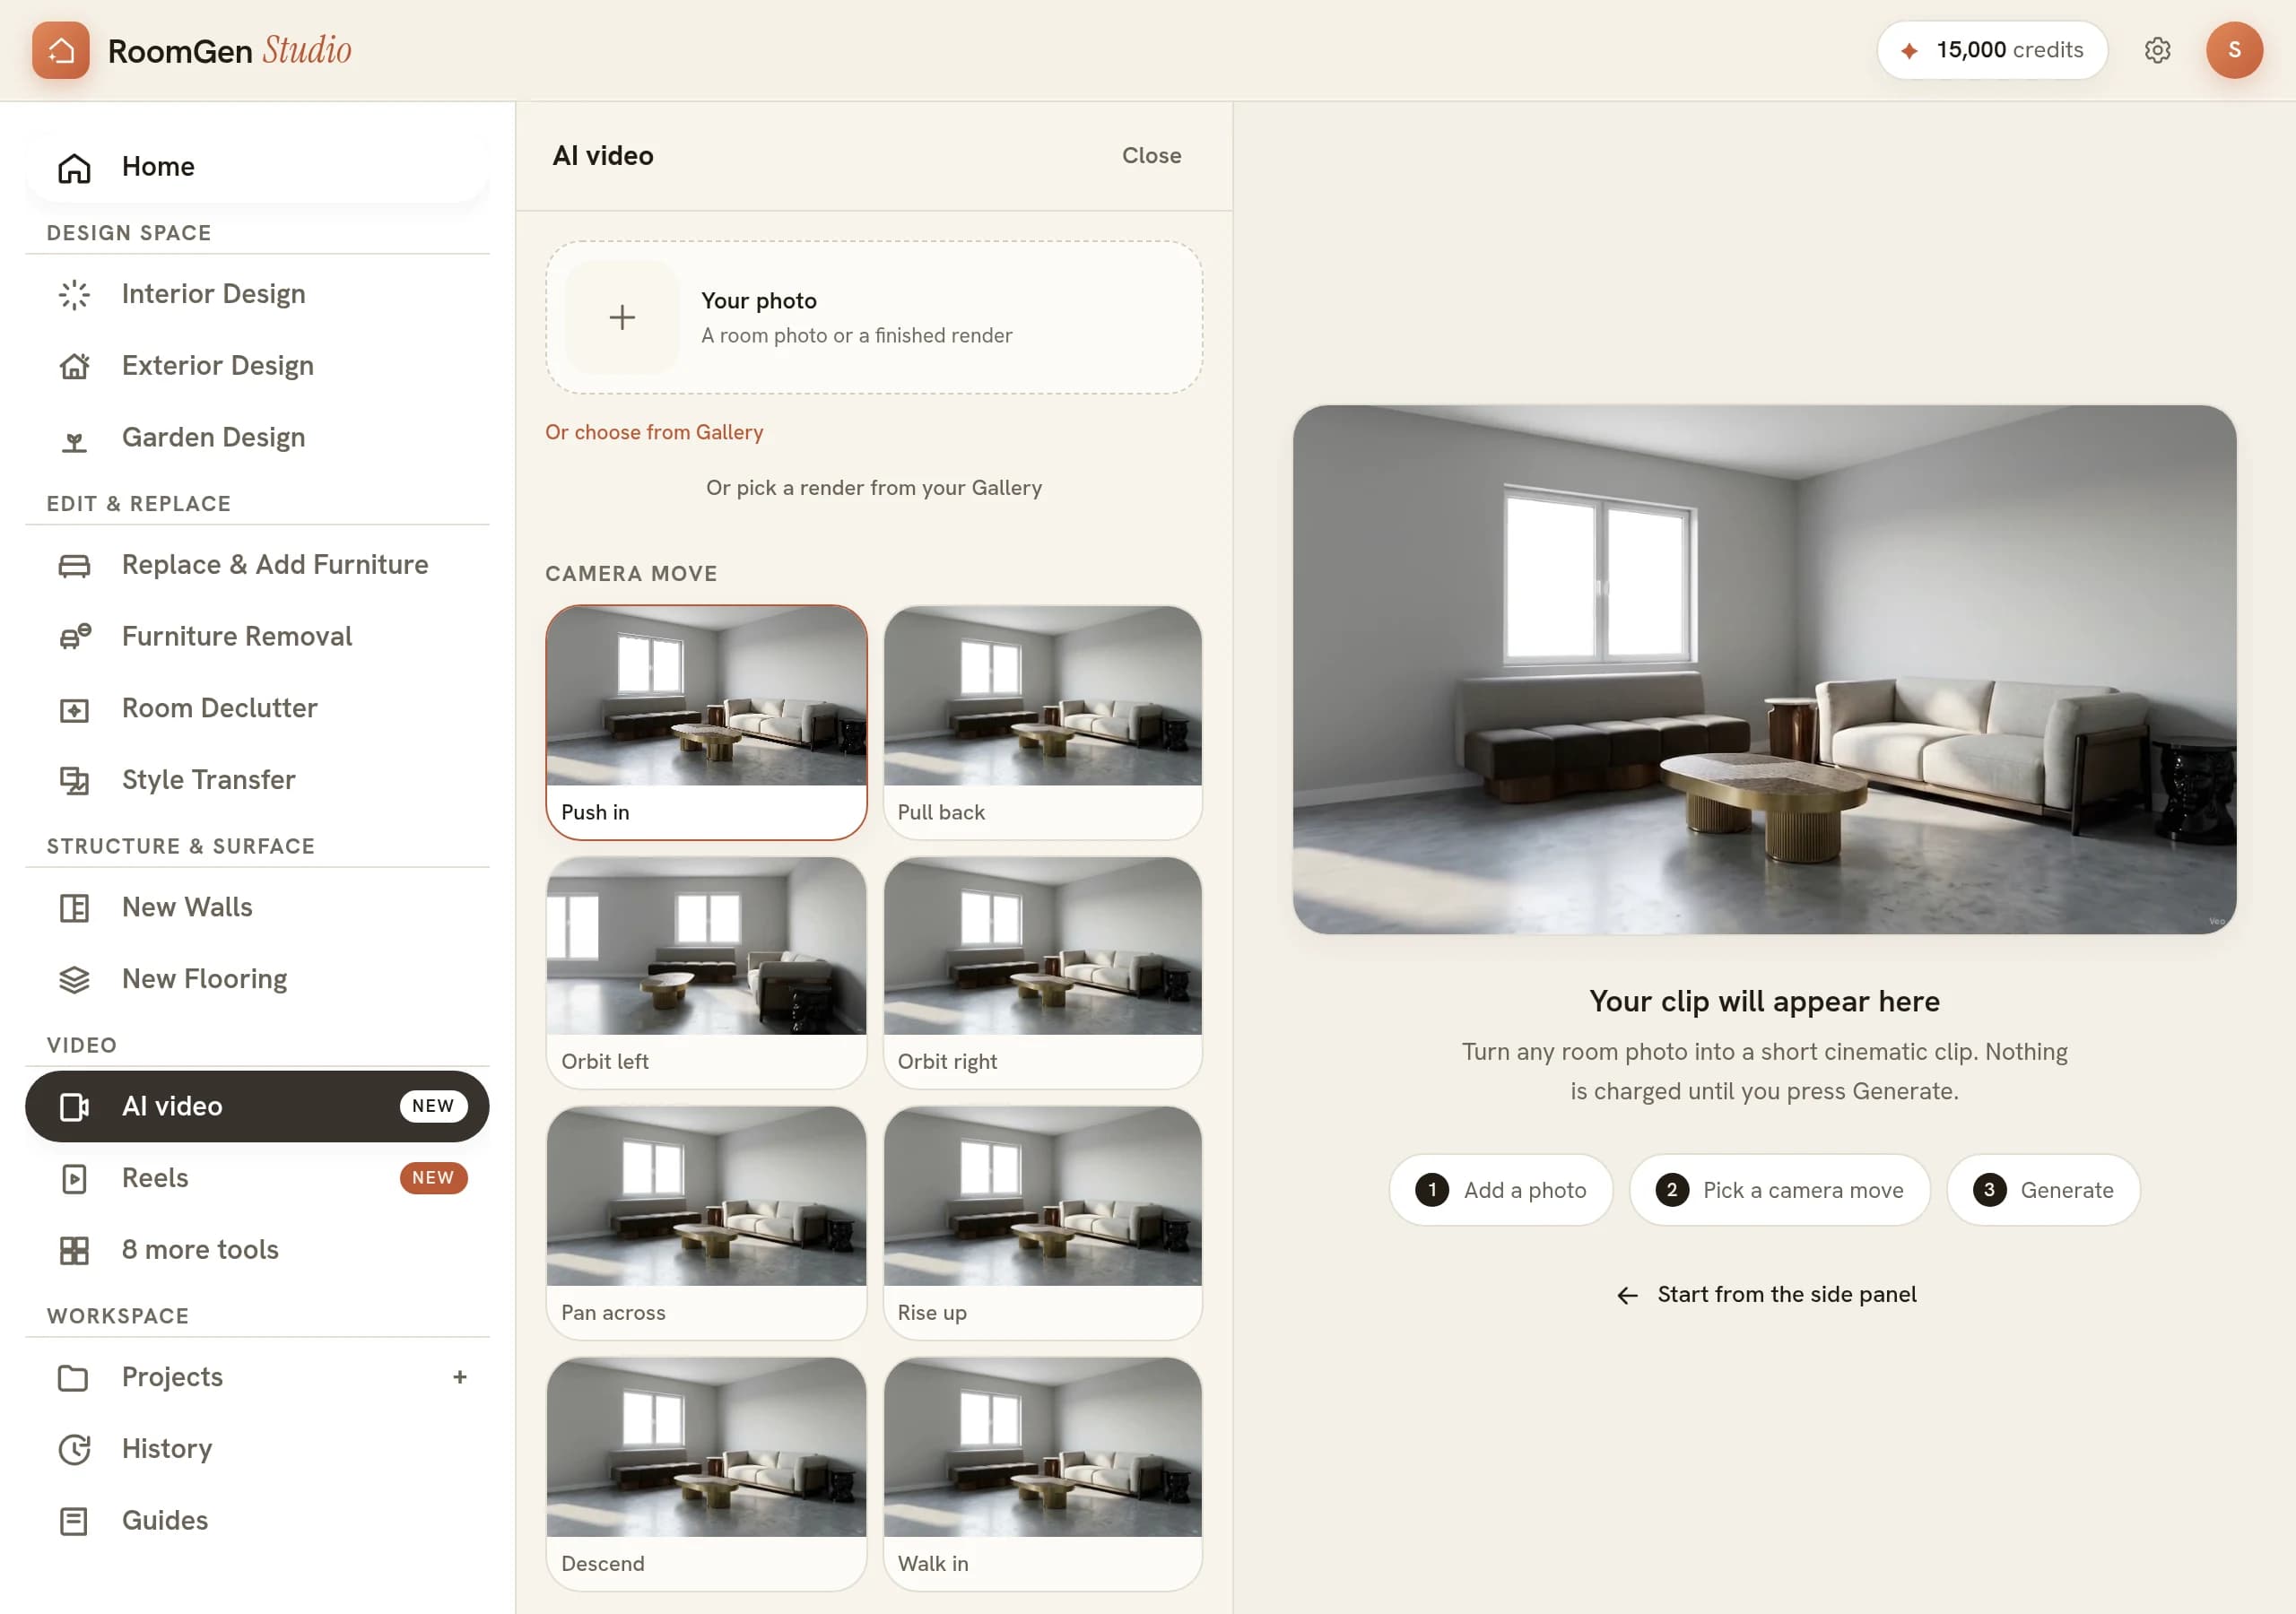
Where a still gives way under a camera move
Four weaknesses account for most disappointing clips, and all four are properties of the source rather than the generation. None of them are difficult to spot once you know to look, and each one is cheaper to fix in the image than to work around in the clip.
The first is a crop pressed against the furniture. When the camera pulls back or arcs away from its starting position, it exposes stretches of wall and floor the still never showed, and freshly revealed surfaces are the least certain part of any clip. Leave a margin of air around the subject and there is far less for the model to invent on the way past it.
The second is scale. A sofa slightly too large for its wall sits quietly in a still, but parallax gives the proportions away as the viewpoint changes, so it is worth resolving before the camera starts moving. The third is reflection. Mirrors and dark glass hold a view that has to shift correctly with the camera, which is a harder ask than a blank wall.
The fourth is clutter at the edges. A half-cropped chair or a cut-off lamp sits at the exact place the camera is about to look, and half an object is the hardest thing to complete convincingly. Crop these out, or bring them fully into frame.
Prepare the still before you animate it
Everything you fix in the image, you fix in every frame of the clip that comes out of it. Fixing the same thing afterwards is not possible, which is what makes a few unhurried minutes on the still the most valuable minutes in the whole process. Do them in this order.
- Clear what should not be there. Personal items, a stray box, a bin. Motion draws the eye across the whole frame, so take the clutter out first.
- Settle the lighting. Decide the hour on the still, since relighting is a still-image edit and a clip inherits whatever mood the source had.
- Check the layout reads. Walkable space, furniture off the walls, nothing intersecting. Errors of arrangement become obvious in motion.
- Give the subject air. A frame with a little space around its focal point leaves the camera somewhere to travel.
- Know where the move ends. Picture the last frame before you generate, because that is the image people remember.
Choosing one frame from a set of renders
Most projects finish with several renders of the same room, and the instinct is to animate whichever one came out prettiest. That is usually the wrong pick. Detail shots and tight vignettes are composed to be looked at rather than entered, so they run out of room within a second of travel and the camera spends the rest of the clip inventing space to keep moving through.
Take the widest correct frame instead. A corner view shot from the doorway or a step inside it usually holds three clear layers of depth, which is enough to give any of the eight moves something honest to work with. If one of your renders happens to include an opening into another space, that is the walk in candidate, and it is the closest thing to a walkthrough that a single still can produce.
For a whole property, one strong frame per room beats three moves on the one room that rendered well. The set then cuts together in order, and each clip carries a space rather than a flourish.
There is one more filter worth applying before you commit. Look at the still at full size and find the part of it you are least sure about, whether that is a reflection, a plant, a run of skirting or a piece of joinery that never quite resolved. Now ask whether your chosen move takes the camera toward it. If it does, either pick a different move or pick a different frame, because the clip will spend its best seconds on your weakest area.
Animate the frame you would print
The standard is simple. Animate only the still you would happily send a client at full size, on the understanding that motion is a magnifier and never a repair. Everything the image already does well becomes more convincing once the camera moves through it, and everything it does badly gets the sustained second look it cannot survive.
Start with a single short pass on your best frame and judge it properly. Watch the edges rather than the centre of the picture, since the edges are where the model is filling in what the still never showed, and a clip that holds together out there will hold together anywhere. Then keep going, one move per clip, until you have a set worth cutting.
Related: turn a render into a video and video for listings.
Common questions
Can I animate a render I made in SketchUp or Blender?
Yes. The finished image is the whole input, so a render exported from SketchUp, 3ds Max, Blender or Lumion animates exactly like one produced here. A scanned client visual or a photograph of a real room works the same way. Nothing needs the original scene file or a camera path.
How long does an animated clip run?
Four seconds. That is the length every clip generates at, so the move has to read inside it, which is why the tightest choice beats the most ambitious one. A slow orbit or a walk in that would want longer is better served by cutting two or three short clips together in the order a viewer would move through the space.
What resolution should the still be before I animate it?
Hand over the full-size render rather than a resized copy or a screenshot. Detail in the source carries into the clip, and a soft still gets softer once the camera pushes into it. Web-sized exports and messaging-app copies are the two that most often disappoint.
Should I animate a portrait or a landscape still?
Decide by where the clip is going, then set the shape before you generate. Clips render as 16:9 or 9:16 only, so a portrait phone photo sent as landscape gets cropped on the wrong axis. Choose 9:16 for Reels and Stories, 16:9 for a portal listing or a slide.
How much does it cost to animate one render?
A four second clip costs 174 credits on the fast model and 348 on the quality one. That makes a first pass cheap enough to treat as a test rather than a commitment. Generate the short version, watch the edges of the frame, and only then spend more on the same still.
Try it on your own plan
Upload a floor plan or a room photo and see the first renders in about thirty seconds.
100 free credits · no credit card required
Get the next guide when it lands
We publish these as we work through what people actually ask about pricing, staging and turnaround. Leave an address to hear when a new one goes up.
We only use your address to email you about RoomGen. Privacy policy · Terms