Floor plan to a furnished top view.
Upload a CAD export or a clear scan and the same layout comes back furnished, in colour, seen from above. The decision that matters is which output style you pick, because each one is aimed at a different reader.
One plan, several ways to show it
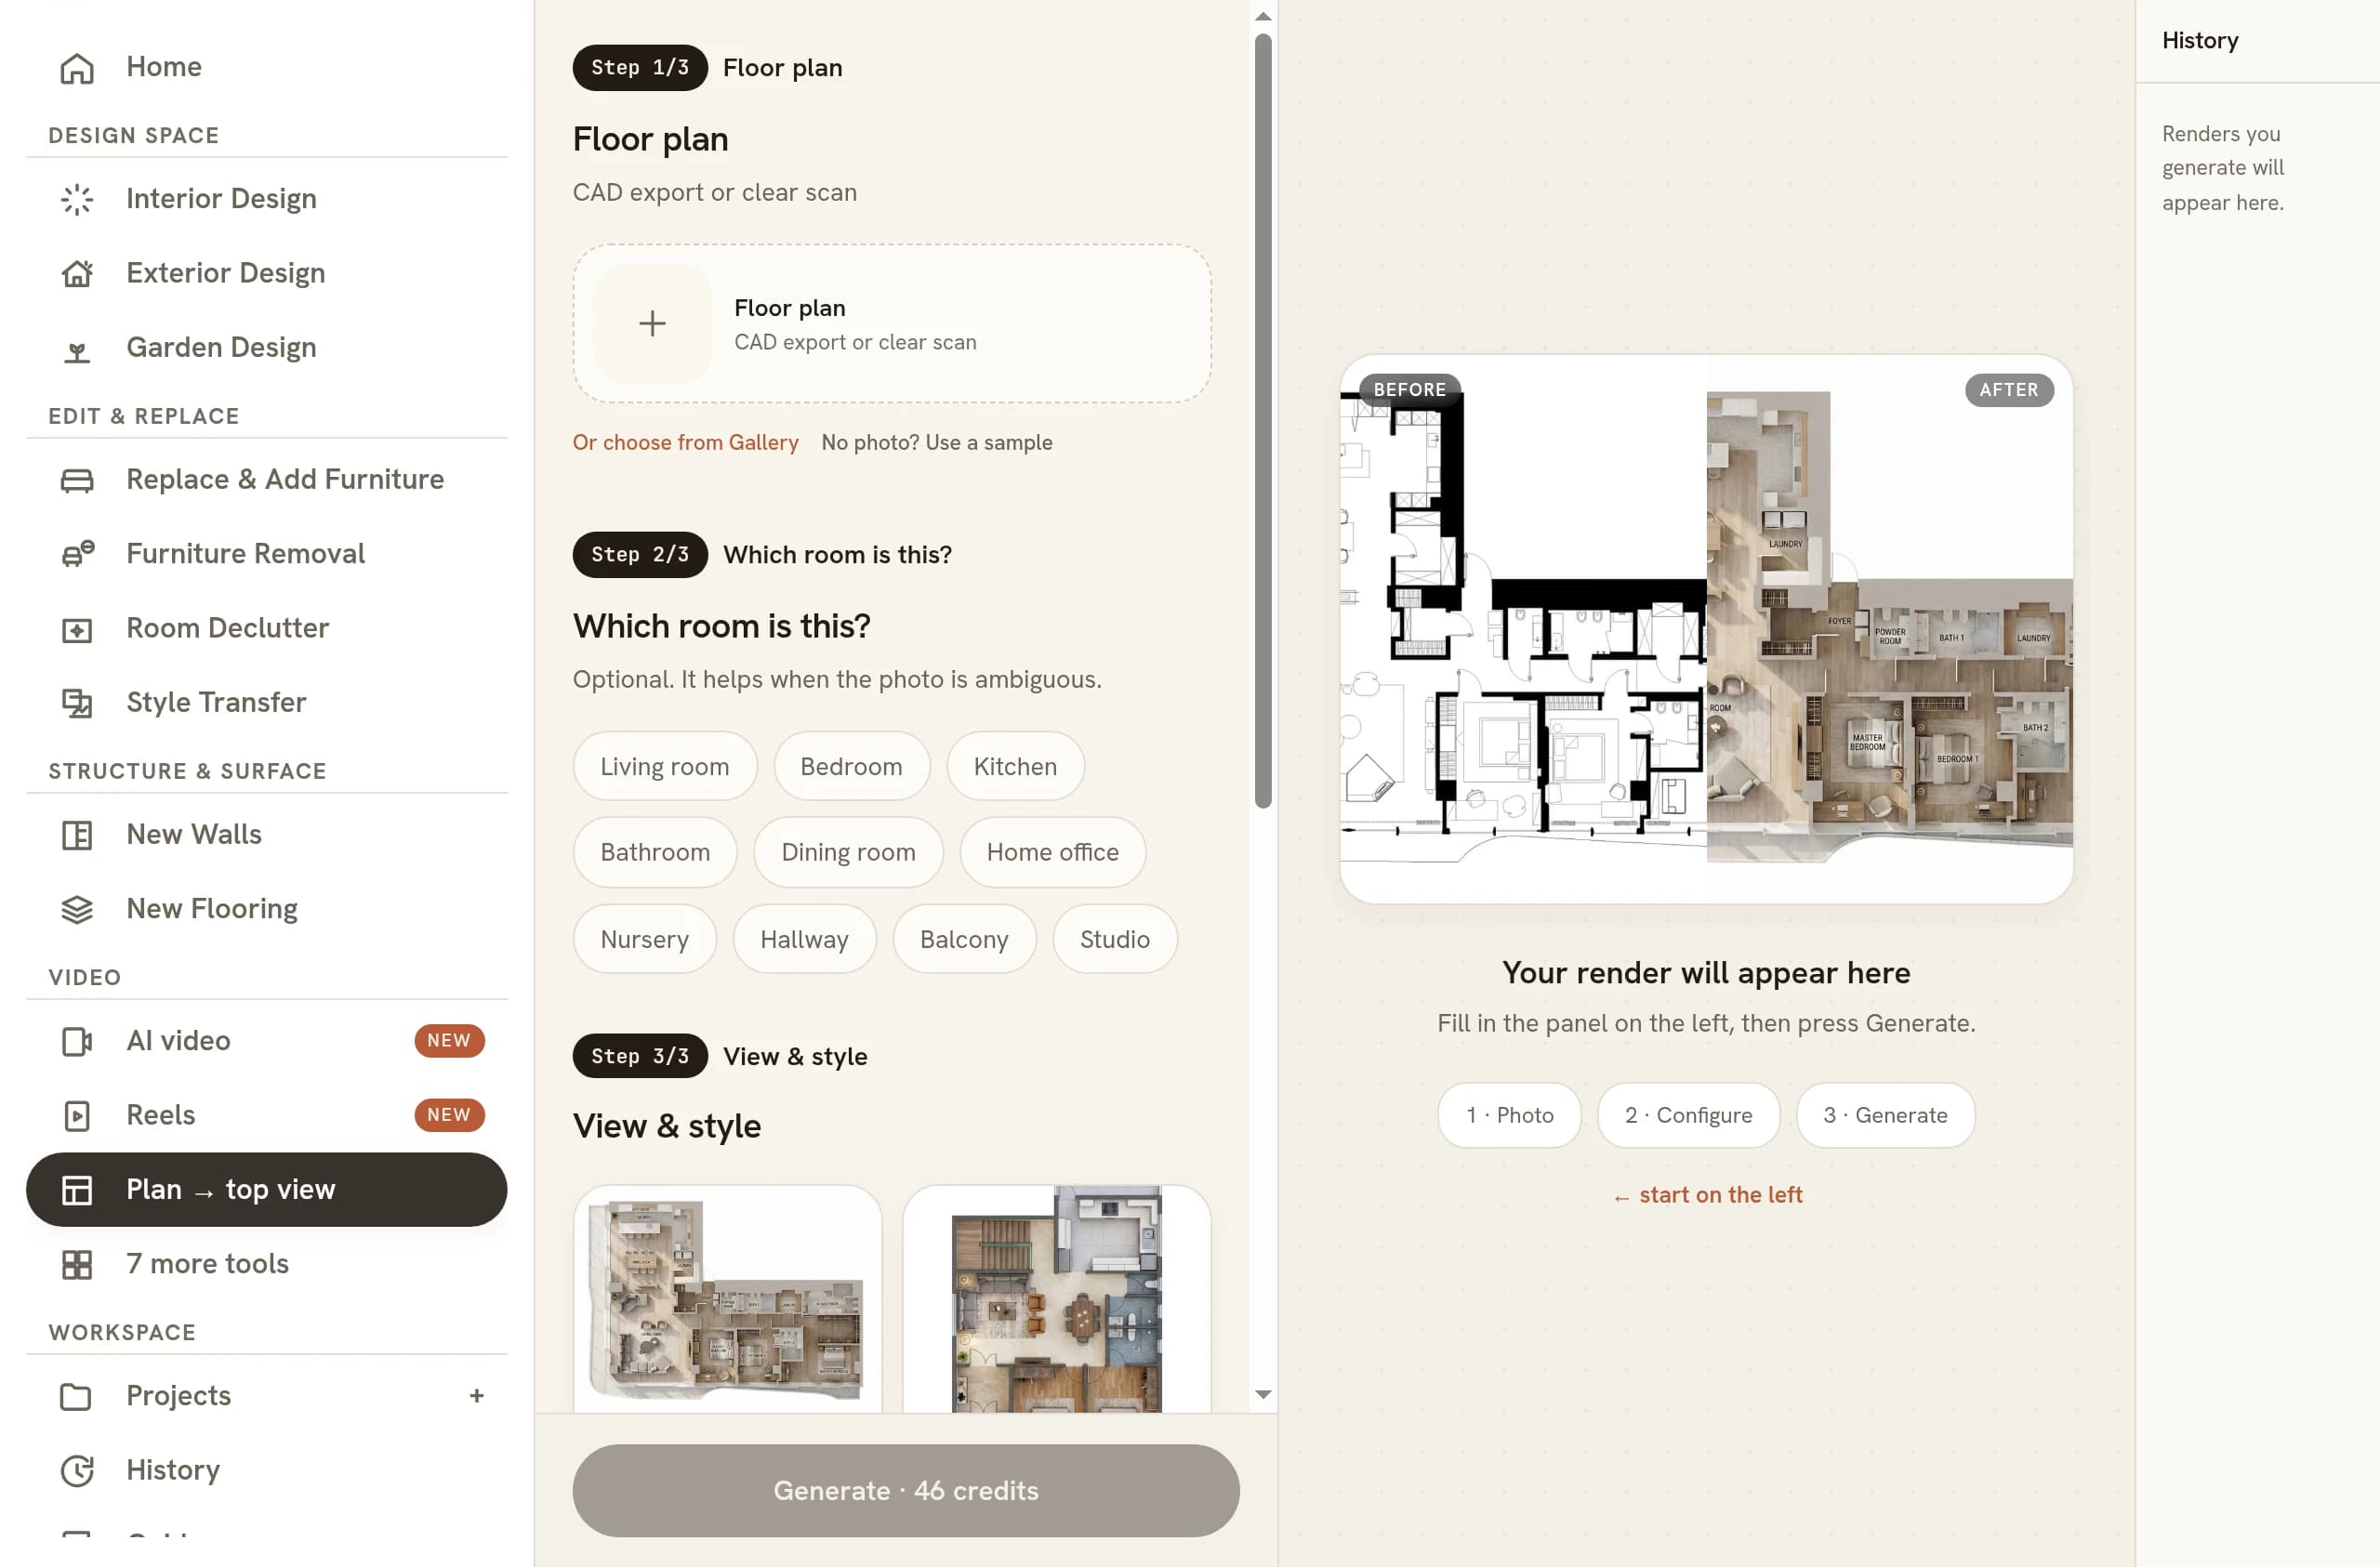
The tool asks for one thing, a floor plan, and the slot says what it wants: a CAD export or a clear scan. What comes back is that layout furnished, with real furniture in every space, a flooring material chosen per room, room labels written out in full and soft daylight falling across the whole drawing. The plan itself is not reinterpreted. The rooms stop being line work and start being rooms.
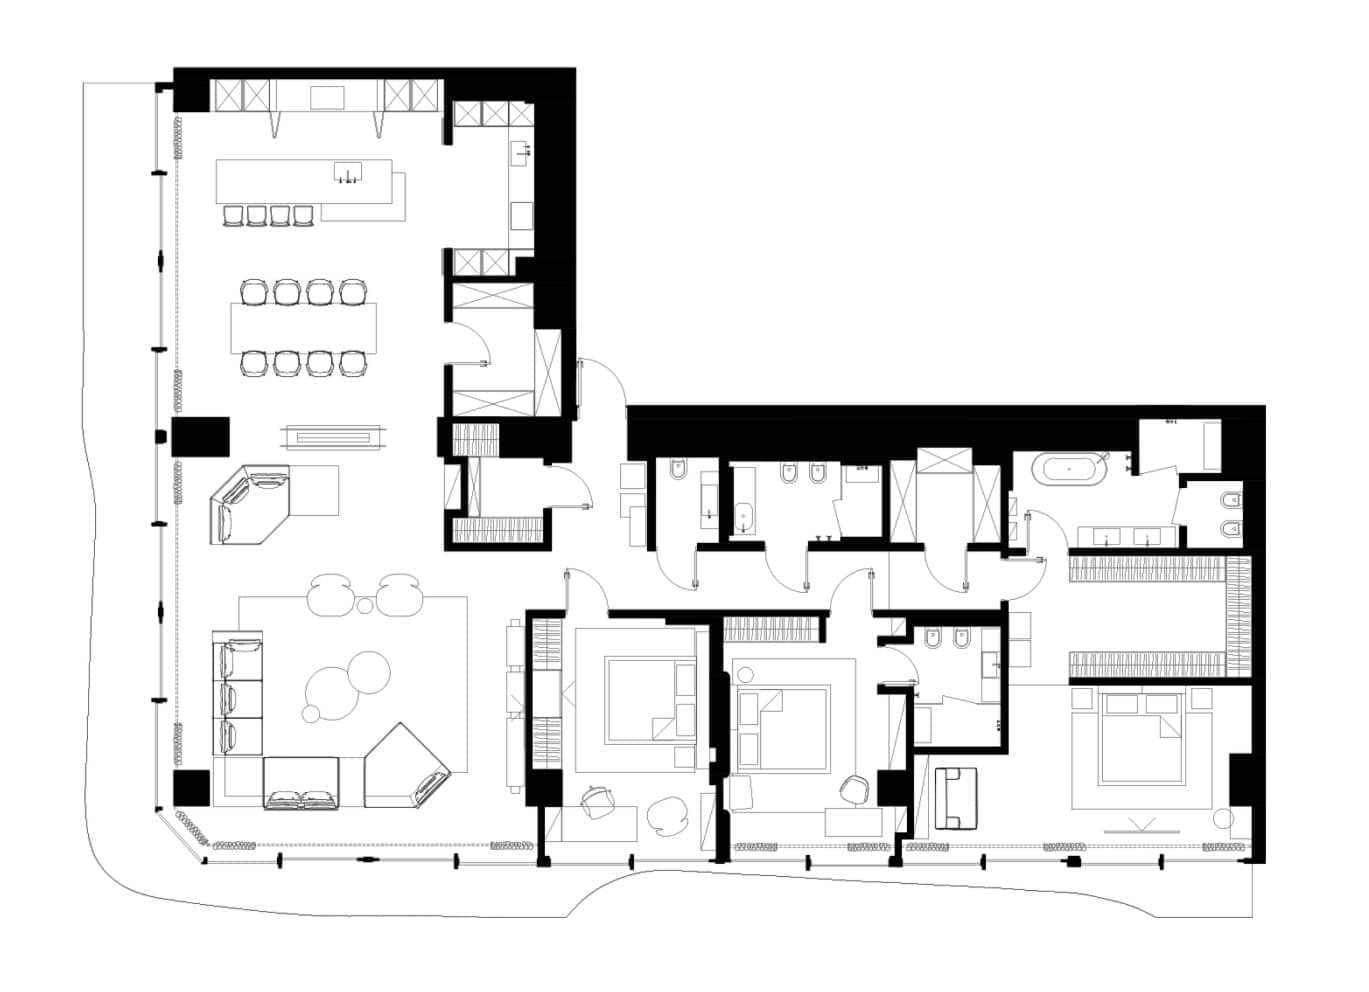 CAD export
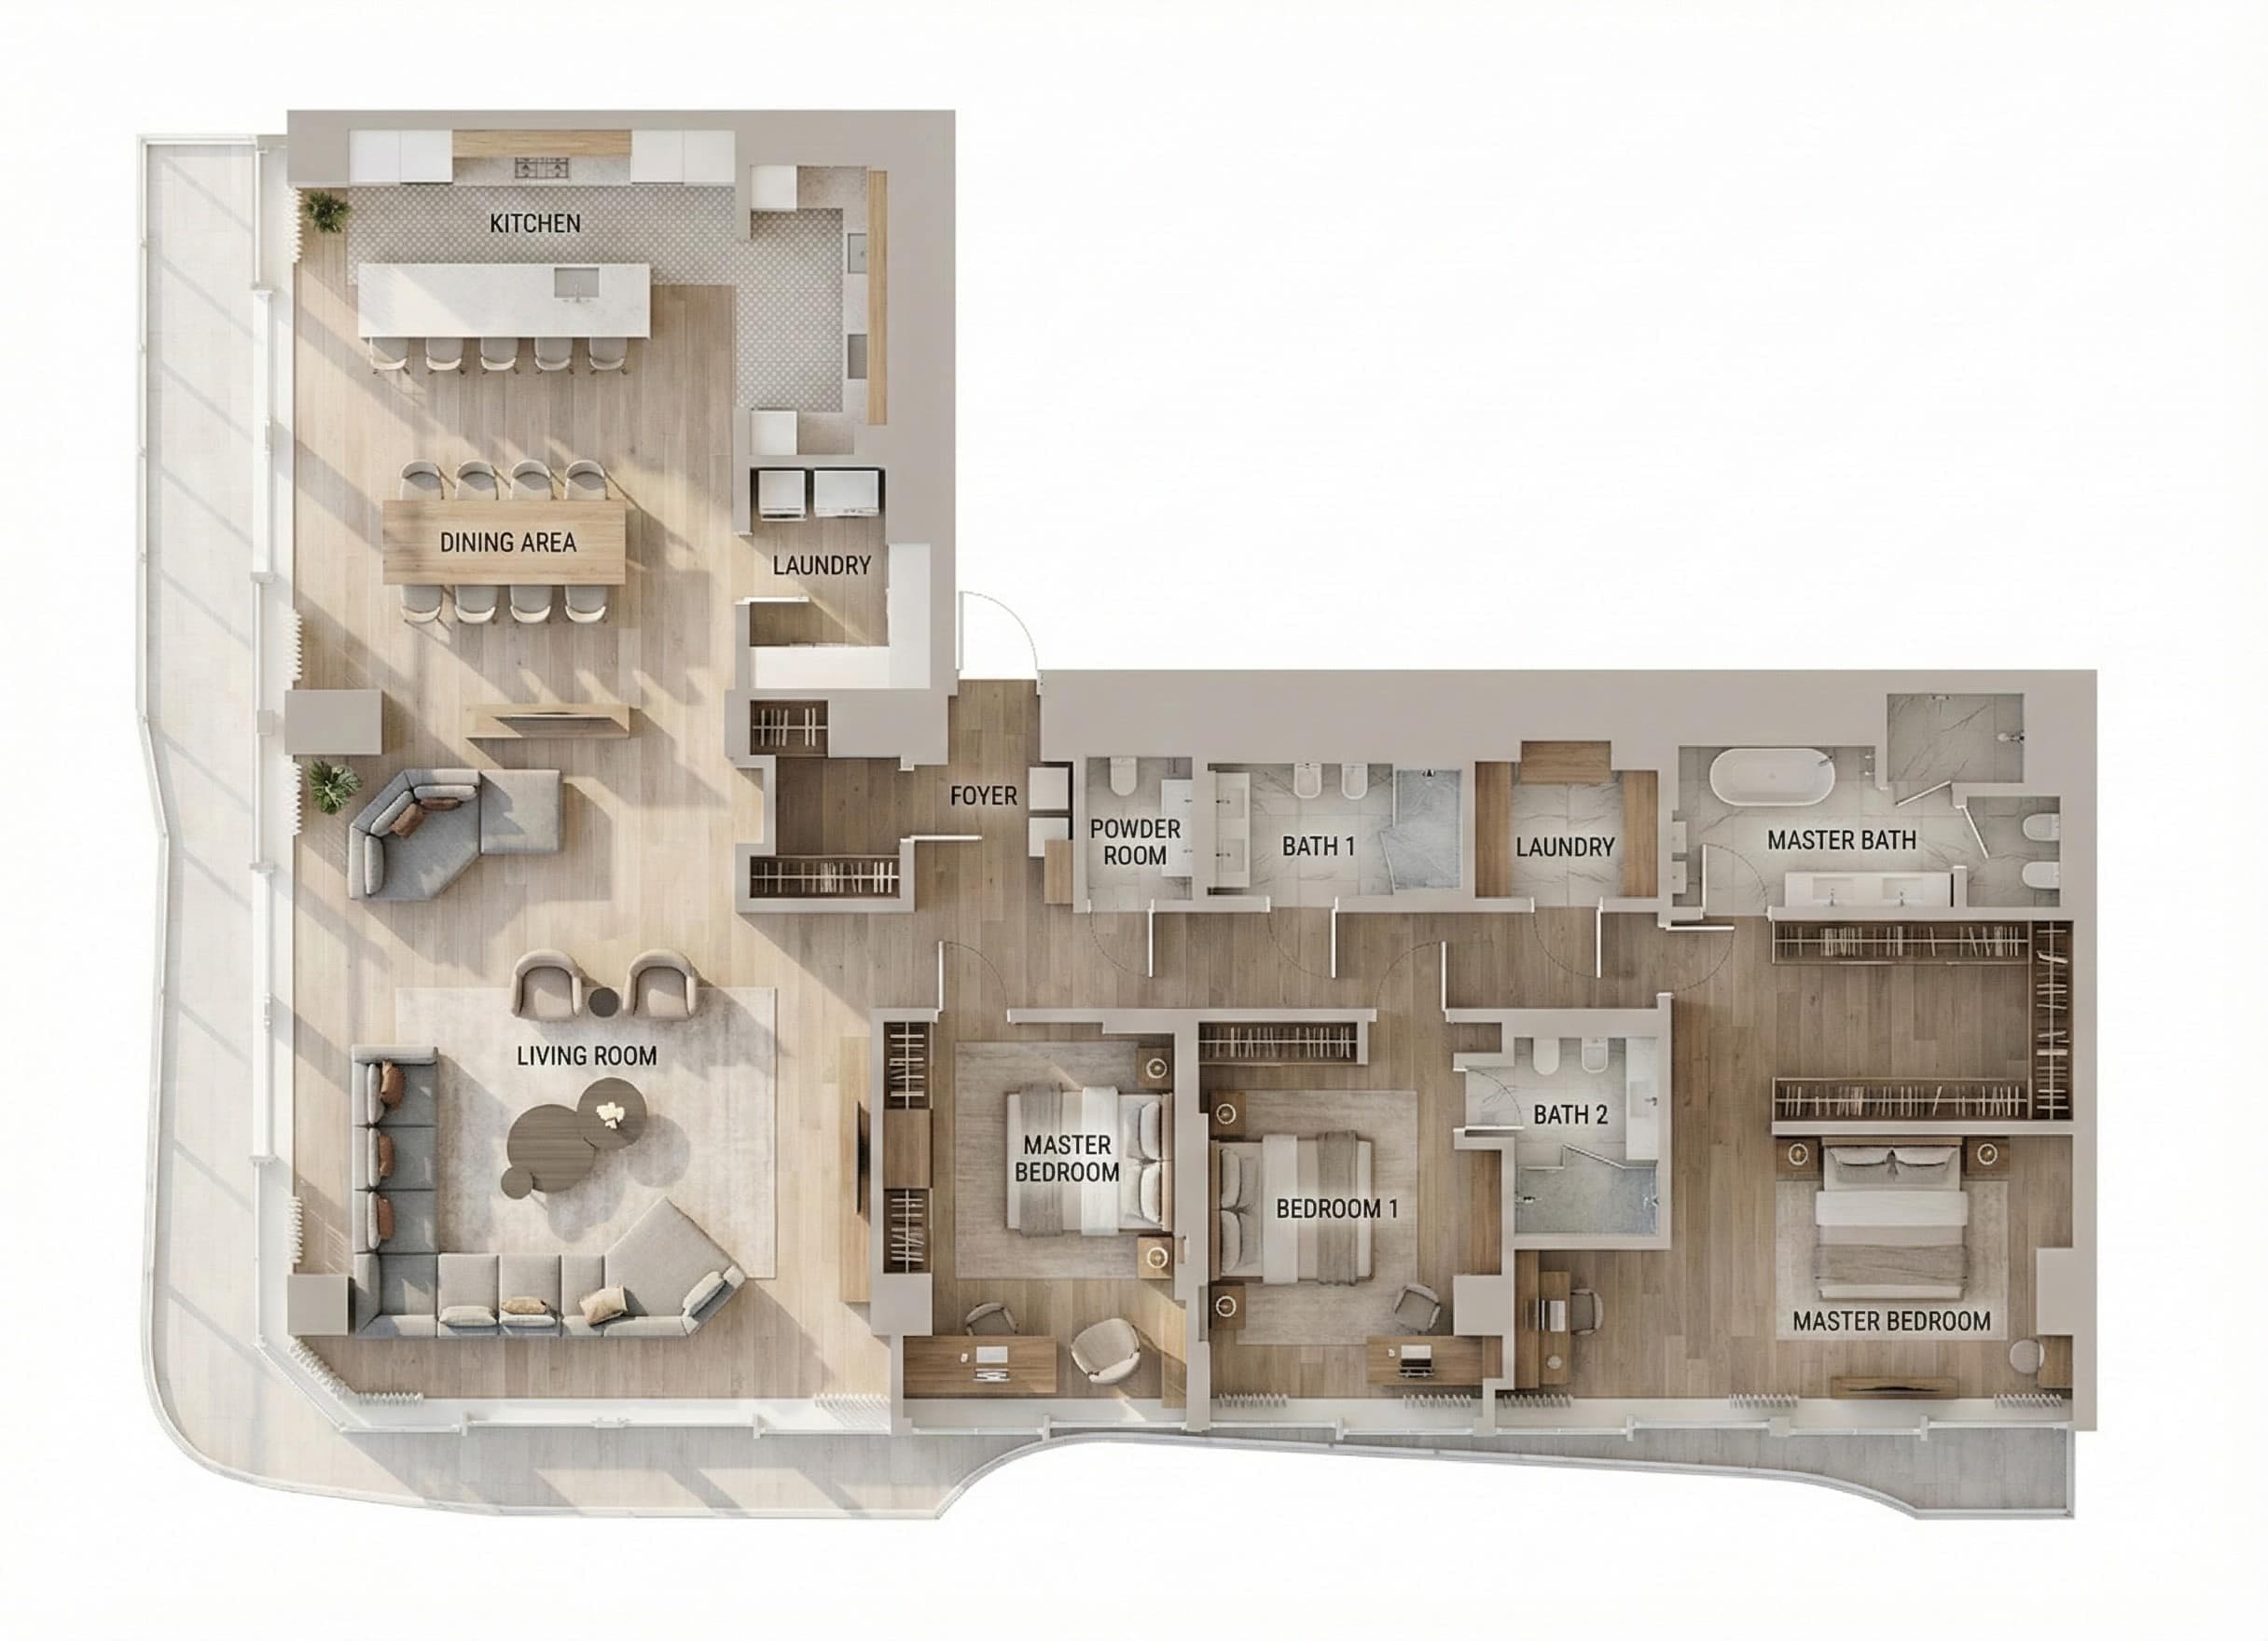 Photoreal top view
The one decision you make before rendering is the view and style, and the picker shows each option as a real example rather than a description. Seven are offered. The field underneath them also takes free text, so a watercolour top view or a clay render is a sentence away, but start with the tiles.
- Photoreal top view. The default, and the pair above. Real materials, real furniture, shadows crossing the floor. It reads as a photograph taken with the roof lifted off.
- Furnished plan.A clean 2D drawing with furniture in it, nearer an architect's presentation sheet than a render. Flat, quiet, and it prints well in black ink on a white page.
- 3D isometric. Blueprint styling with the walls extruded upward, so the drawing carries partition height and the shape of the volume as well as the layout.
- Aerial, day.A photoreal bird's-eye view in soft morning light. Warmer and more atmospheric than the flat top view, and correspondingly looser.
- Aerial, night. The same view after dark, carried by warm artificial lighting. The most striking single image of the set, and the least useful for reading a layout.
- Zoning map. Colour-coded functional zones with a legend beside them. A diagram rather than a picture, and it exists to support an argument about how the space is used.
- Layout plan.A clean coloured CAD-style plan. The most neutral output of the seven, and the one that survives sitting in a document next to somebody else's drawing.
Picking the view for the person reading it
Most of the waste here comes from sending a beautiful image to someone who needed a legible one. A buyer scrolling a portal has never read a technical drawing and is deciding at a glance whether the flat is worth a click, which is exactly what the photoreal top view is for. It answers the question a plan cannot: does this look like somewhere to live.
A design client signing off a scheme needs something steadier. The furnished plan and the layout plan both hold up under a second and third reading, because nothing in them is doing atmospheric work, and they sit alongside a furnished plan from your own drawing set without a clash of styles. Use the 3D isometric when the conversation has turned to volume: mezzanines, double-height rooms, a partition somebody wants removed.
The zoning map belongs in a meeting about use rather than taste. Colour by function and the circulation argument makes itself, which is worth more than a render when you are defending why the study sits where it does. Keep the two aerials for the top of a listing, a social post, or the cover slide of a deck. Night in particular sells a mood and tells a reader almost nothing, so never lead a floor plan explanation with it.
What the plan upload has to look like
Output quality here is mostly decided before you upload. The drawing is the only input, so anything ambiguous in it becomes a guess in the render. A clean CAD export at full resolution is the easy case. A photographed sketch can work too, and the failure modes are the ordinary ones.
- One storey per upload. A sheet with the ground and first floors side by side reads as one enormous dwelling. Crop and run them separately.
- Cropped to the drawing. Title blocks, north arrows, revision tables and logos are text, and the render will try to interpret them. Trim to the walls.
- Square to the page. A scan photographed at an angle skews every wall, and the render inherits the skew rather than correcting it.
- Fixtures left in. The hob, sink, toilet, bath, wardrobes and stairs are how the render knows a bathroom from a bedroom. Symbols you delete for tidiness are rooms you have made anonymous.
- Line weights that survive a zoom. If you cannot tell a wall from a worktop at full size, neither can the render.
Dimensions in the drawing help more than they look like they should, because they give each room a size to reason against. That is the same information that stops a render getting scale wrong and puts a three-seat sofa in a room that fits one.
The labels are generated, so read them
Every space gets named. Any text in the original is removed and replaced rather than copied, which is what lets a plan labelled in another language, or labelled illegibly, come back readable. It also means the labels are the render's opinion of what each room is, formed from the fixtures and the shapes it can see.
That opinion can repeat itself. Look at the example on this page: two separate rooms come back labelled MASTER BEDROOM, and two come back labelled LAUNDRY. Both readings are defensible from the drawing, and both would be embarrassing in front of a client. Read every label at full size before the image leaves your machine, the same way you would proof a caption.
What the tool will not do
It renders the plan you gave it. It does not improve the plan. The instruction it follows is strict about this: no item present in the original may be dropped, nothing absent may be added, and the room count, the placement and the spatial layout all have to survive. So a corridor that was too narrow on paper is still too narrow in colour.
Read that as a feature. A presentation view whose walls quietly moved is worse than no presentation view, because somebody will build from the drawing it came from. If the layout itself is the problem, fix the drawing and render again. If the furniture is the problem, that is a question about how the furniture is placed, and it is answered in the plan rather than in the picture.
Where the top view goes next
The upload is registered as that project's floor plan, not as a loose image, so the drawing stays available once the top view is done. From the same plan you can carry on into eye-level renders of the individual rooms. That is a natural pairing for a client presentation: one overview that explains the whole flat, then the handful of rooms that sell it.
For a listing, the top view earns its place as the orientation image. A buyer who has scrolled a set of interior photographs still does not know how the rooms connect, and one furnished plan settles it. Put it first in the set, keep the night aerial for the thumbnail if you want the click, and if the property warrants motion, the same renders feed a video for the listing.
Common questions
Can I get more than one style from the same floor plan?
Yes, and it is worth doing. Each style is a separate render from the same upload, so you can run the photoreal top view for the listing and the zoning map for the design meeting without redrawing anything. The plan stays attached to the project, so later runs start from the drawing you already uploaded.
Can I turn off the room labels on a floor plan render?
Yes. The tool labels every space by design, because a presentation view is usually read by someone who cannot interpret line work. When you want a clean image with no text at all, the Designer library carries a plan views variant that renders the same layout and suppresses labels, dimensions and annotations entirely.
Is a rendered floor plan accurate enough to measure from?
No, and it should never be used that way. The render is a presentation image built to match the drawing you supplied, not a measured document, so dimensions belong in the CAD file that produced it. Keep the original plan as the source of truth and treat the top view as the picture that explains it.
Can I use a furnished top view in a property listing?
Yes, with the same disclosure any staged image needs. The furniture is illustrative and the buyer is not receiving it, so label the image as a furnished visualisation wherever your market expects that. The walls, doors and room count come from the real plan, which is the part a buyer is entitled to rely on.
Does this work for a whole apartment or one room at a time?
A whole floor at once is the intended use. The example on this page is a full apartment with a kitchen, a living room, four bathrooms and three bedrooms rendered in a single pass. Upload one storey per render, and run a multi-level property as one render per floor so each drawing gets the full frame.
Try it on your own plan
Upload a floor plan or a room photo and see the first renders in about thirty seconds.
100 free credits · no credit card required
Get the next guide when it lands
We publish these as we work through what people actually ask about pricing, staging and turnaround. Leave an address to hear when a new one goes up.
We only use your address to email you about RoomGen. Privacy policy · Terms